Step 3: Run and preview the built-in segmentation application
After the SmartVision Engine application is installed, two sample applications are built-in by default [Application Example (Picture Acquisition)] and [Application Example (Segmentation)], allowing users to quickly experience the inference effect of smart cameras. A sample application is shown below:
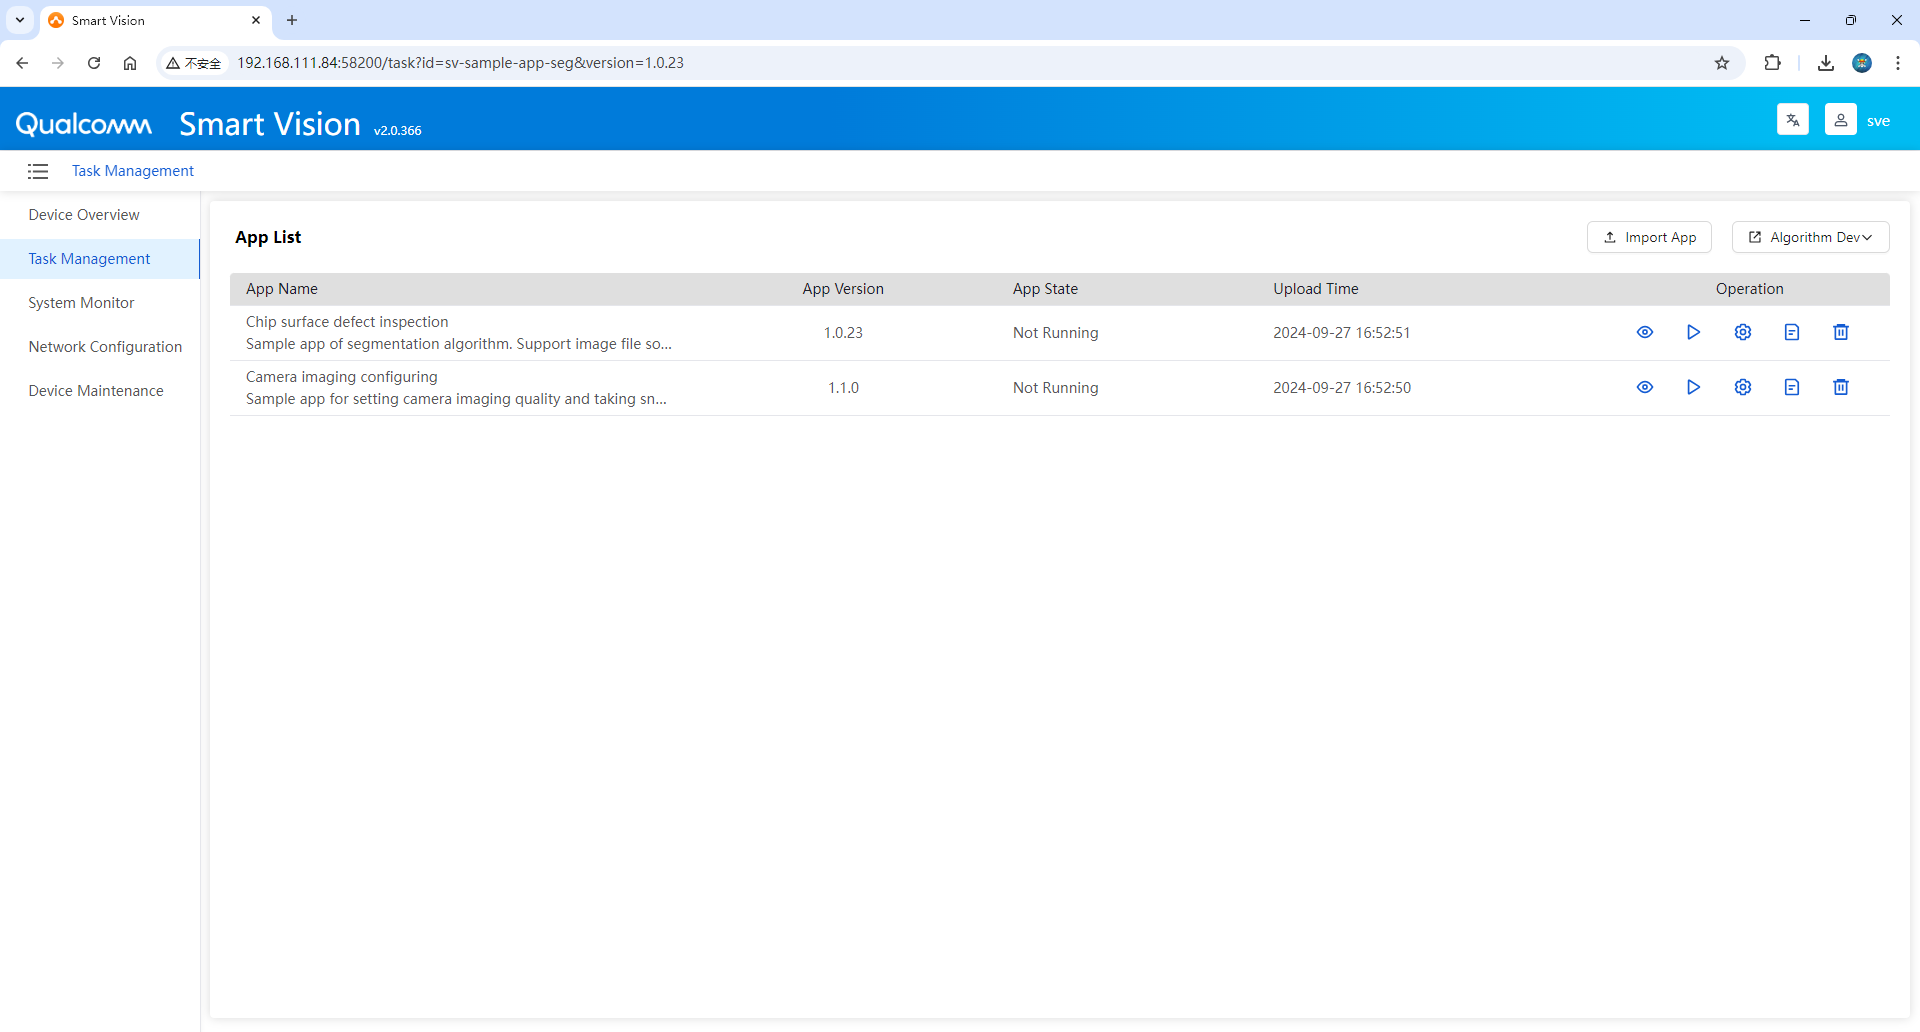
Take [Application Example (Segmentation)] as an example to run and preview the inference effect
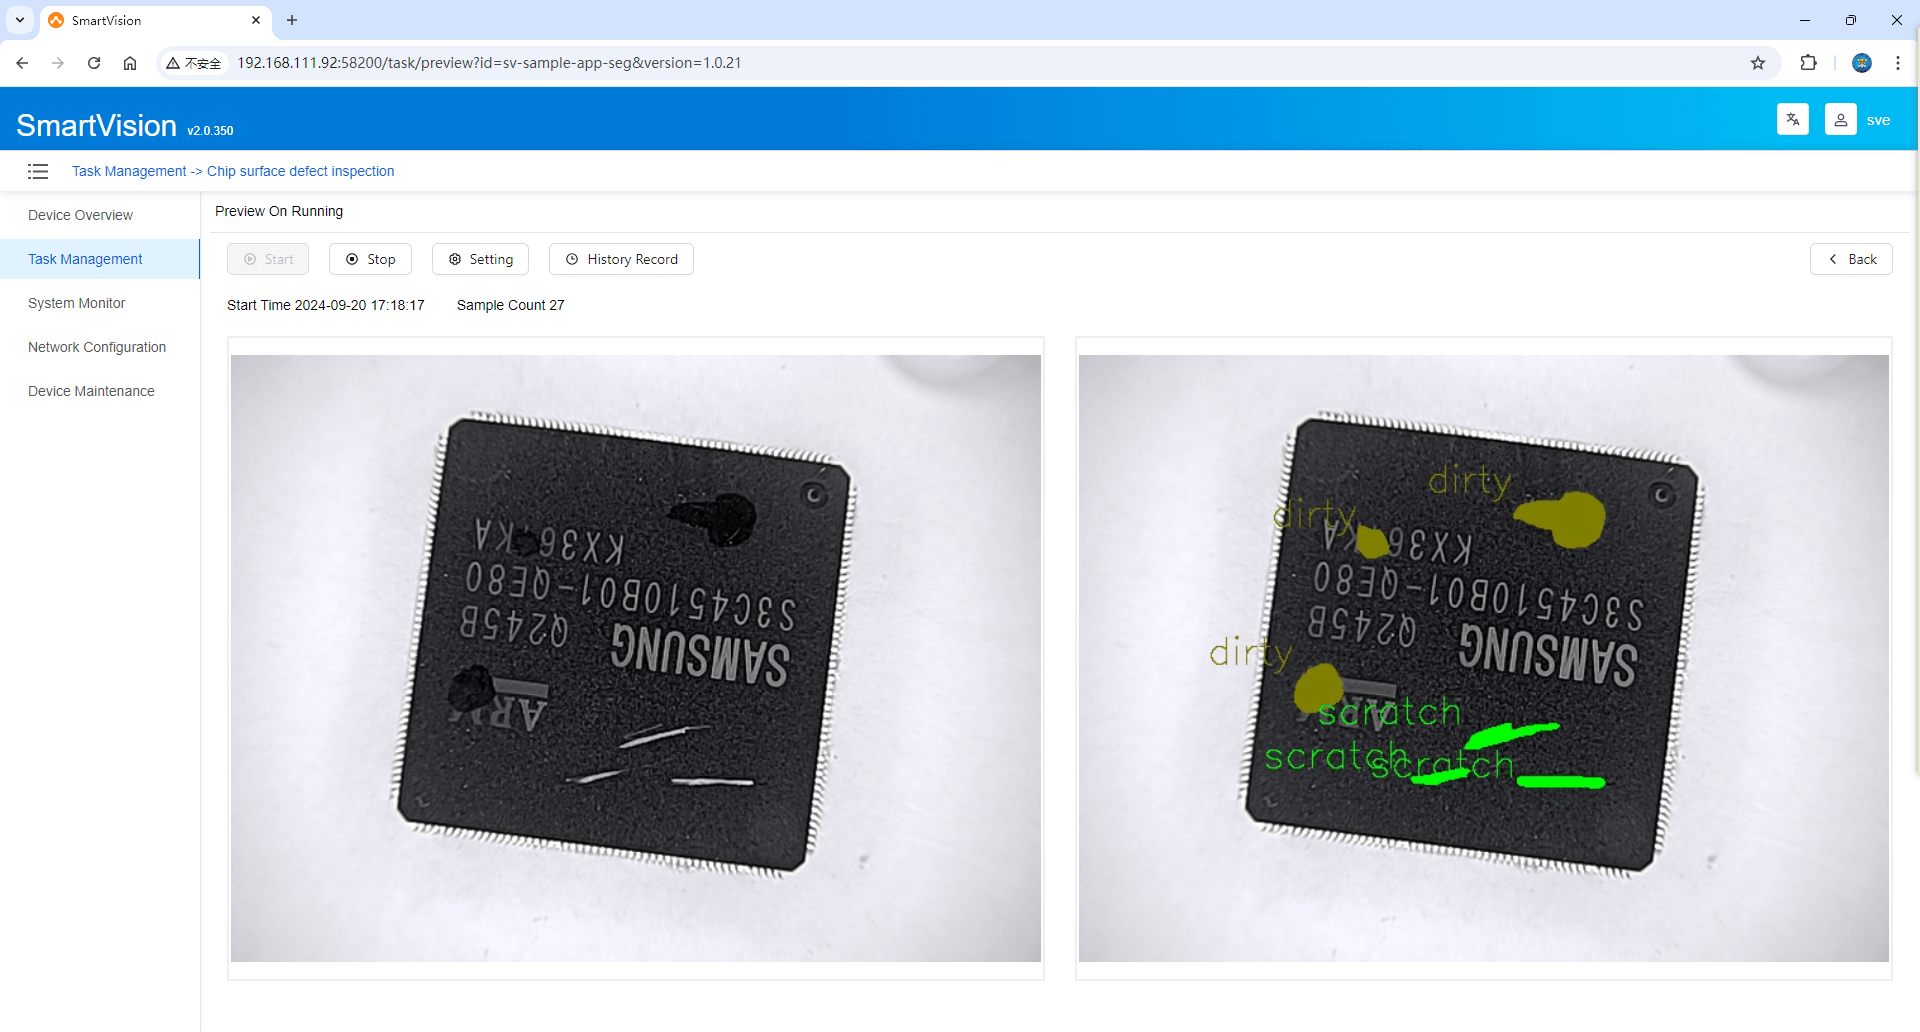
Preview running effect
- Click the [ Start/Stop Application ] button in the list to run the application example.
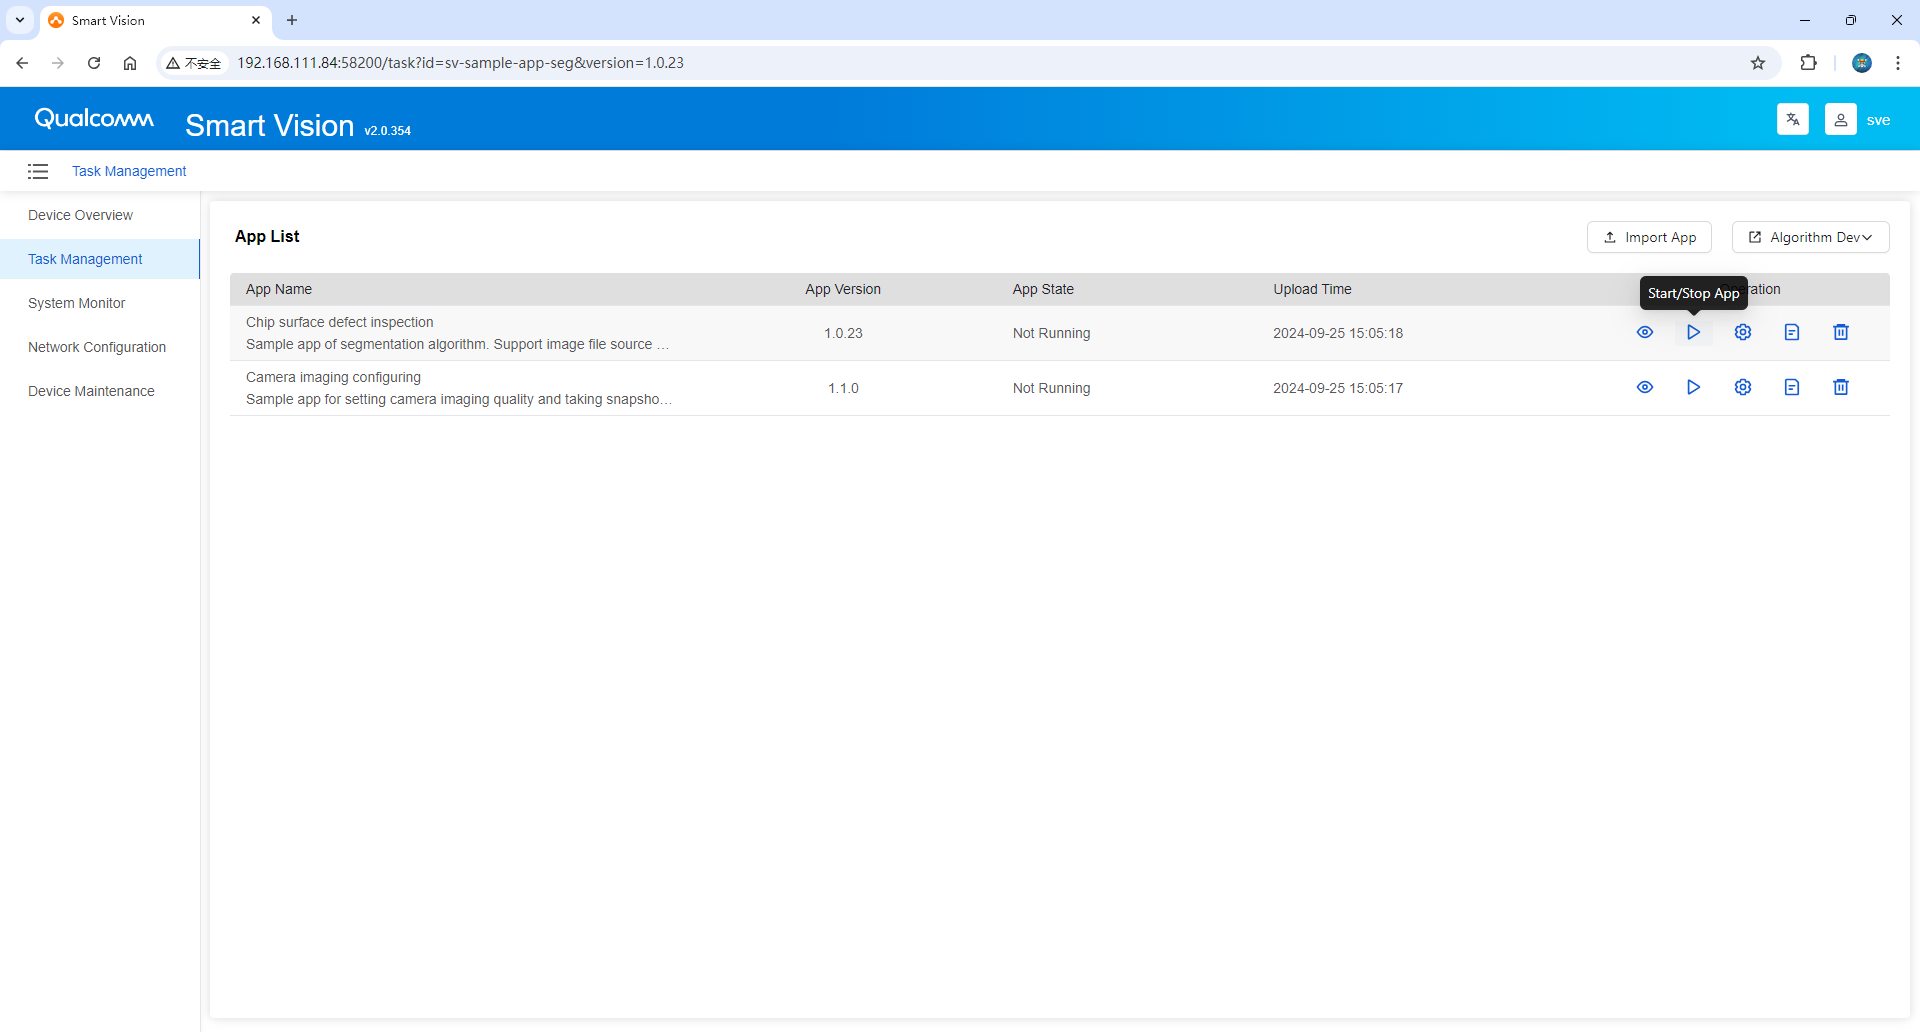
- Click the [Run Preview] button to view the running effect.
Imaging parameter settings
By adjusting the camera parameter settings, the optimal imaging effect can be achieved. As shown below:
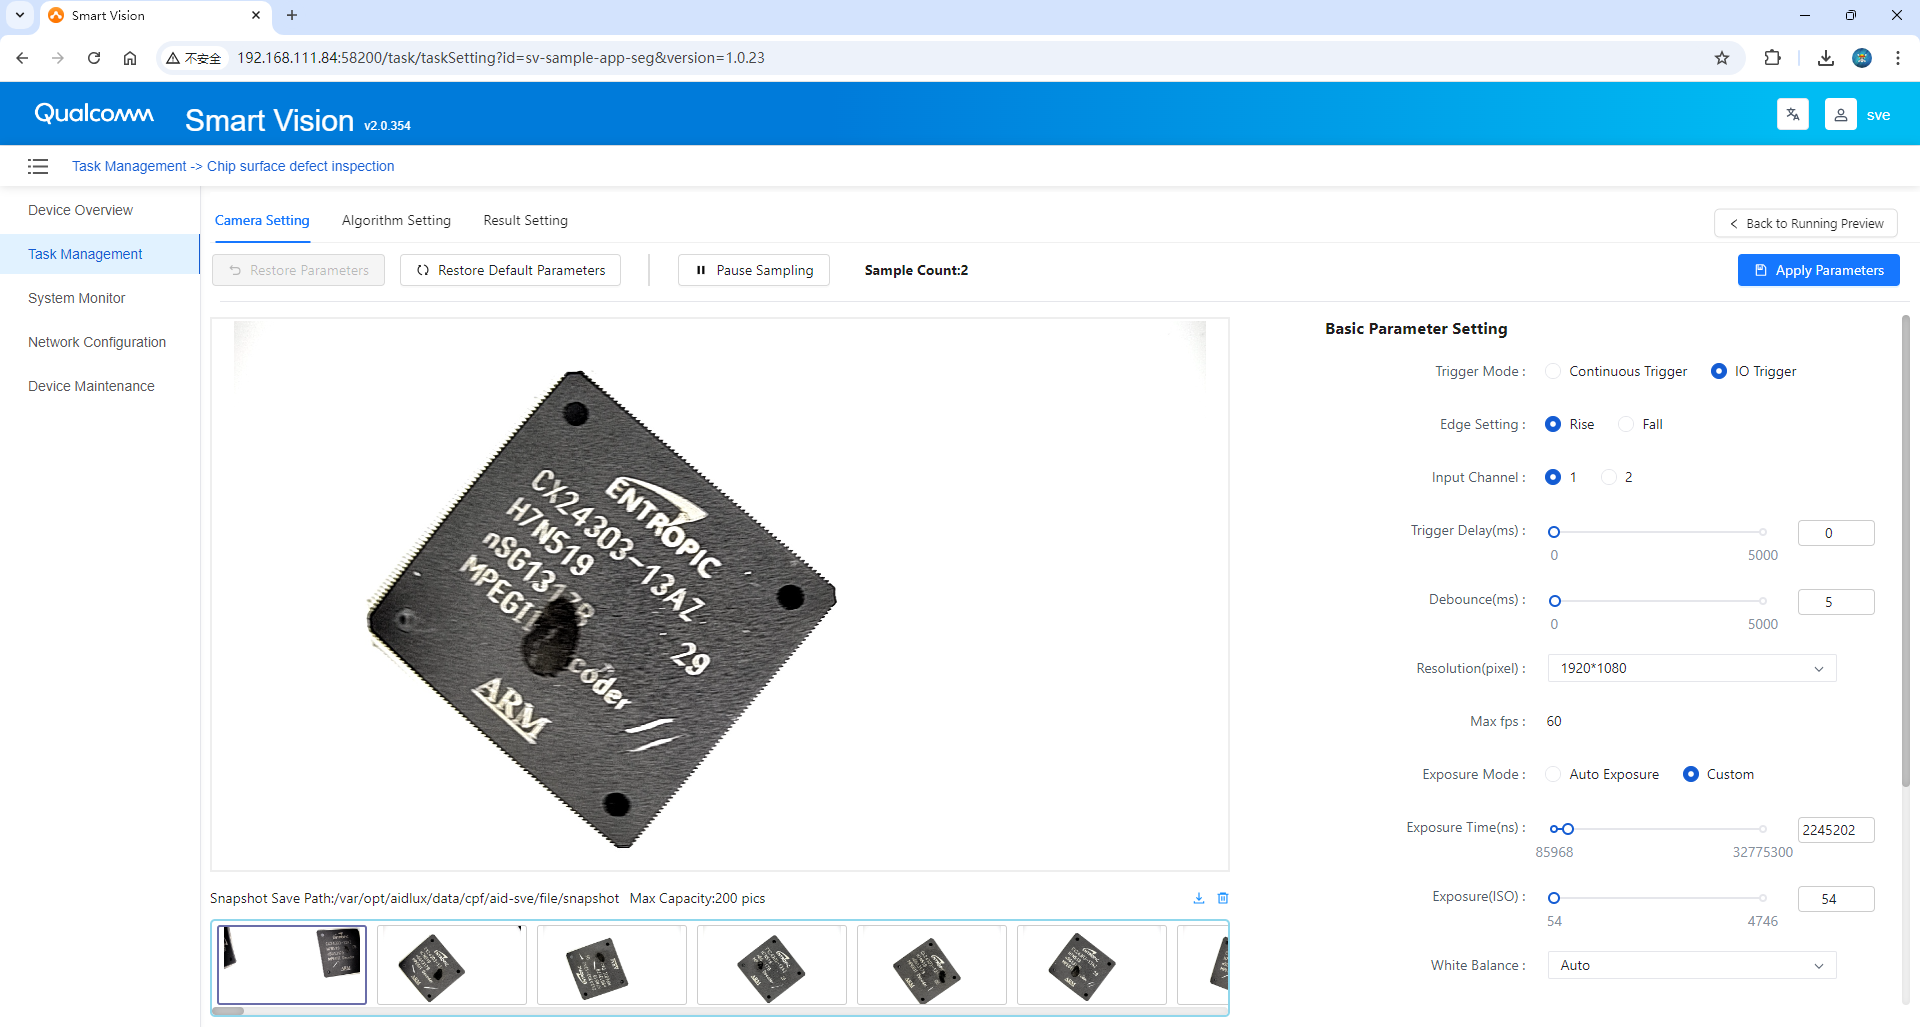
[Trigger mode] is divided into two modes: "continuous trigger" and "IO trigger"
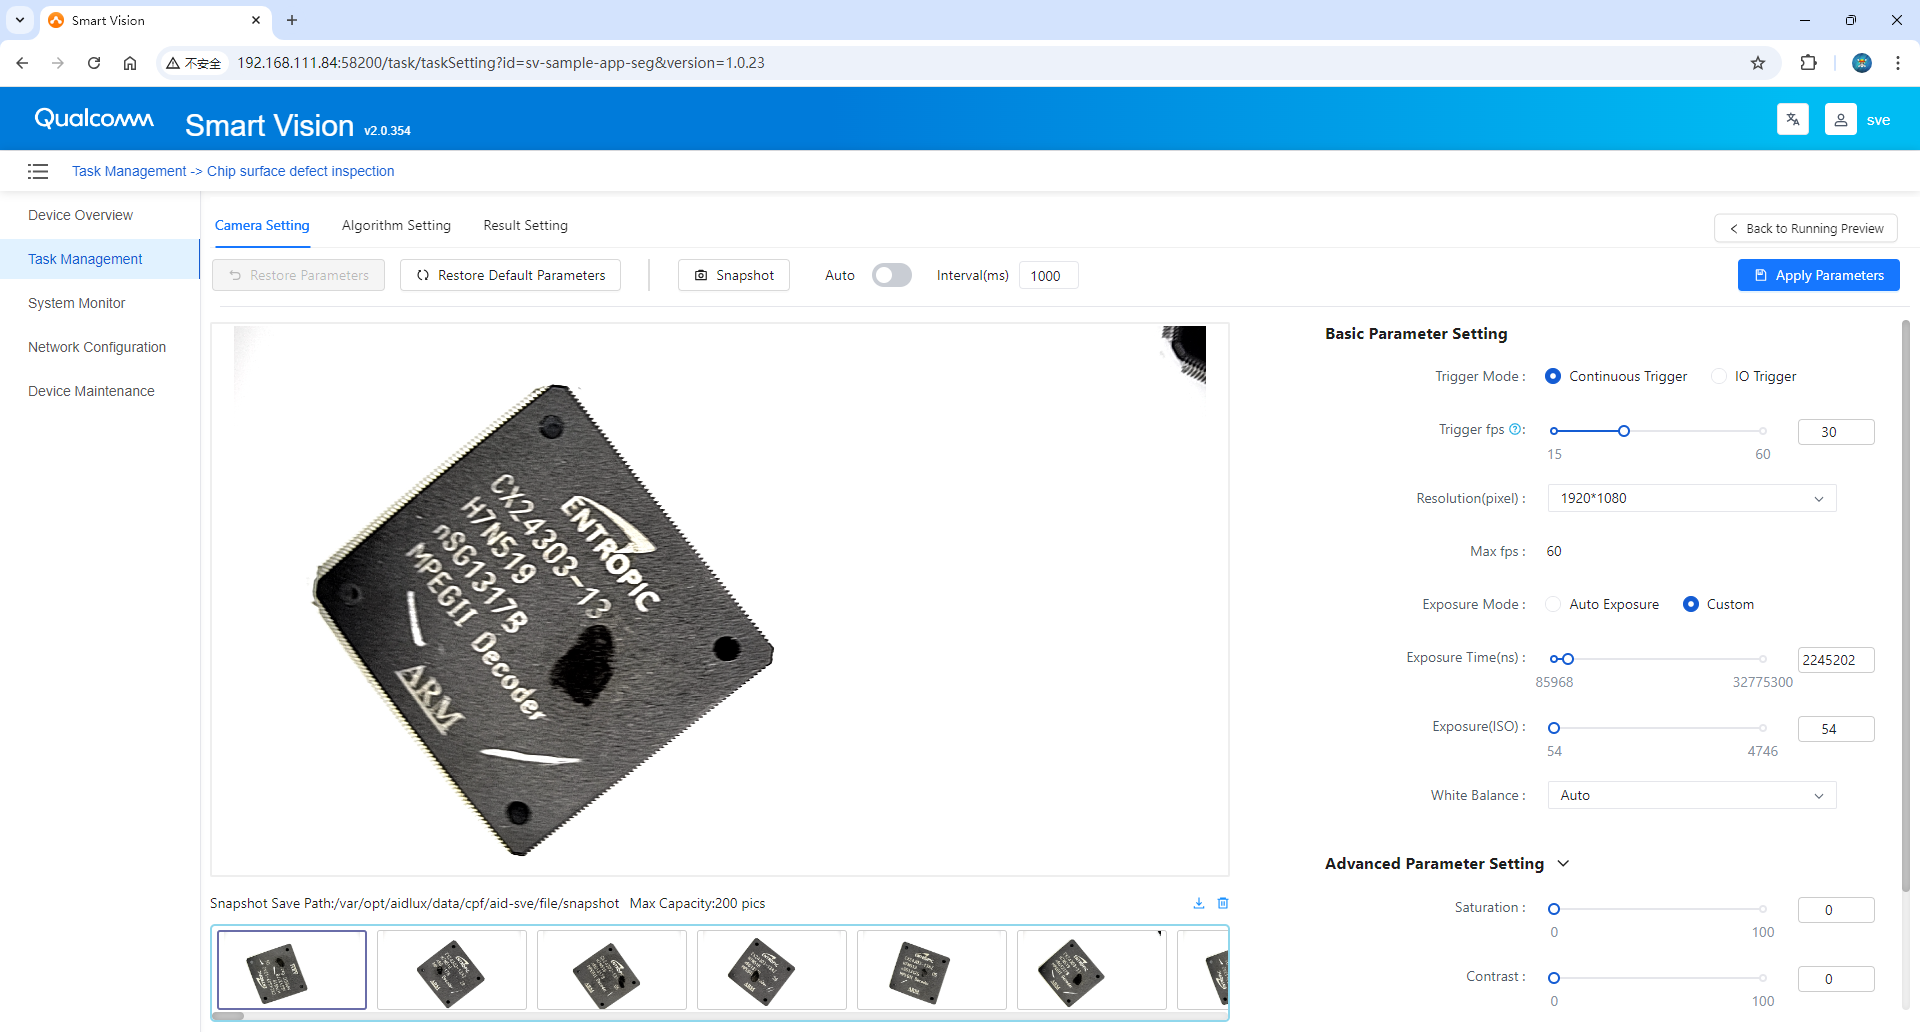
When the trigger mode of [ Continuous Trigger ] is selected, the configuration is automatically saved. After the operation is successful, the camera is automatically turned on, and the images captured by the camera are displayed in real time at the same time. This method supports updating camera parameters when the camera is open.
Click the [Capture Snapshot] button to take a photo of the currently visible real-time image, save it, and display it below. Turning on the [ Auto] button will automatically take pictures and save them according to the set interval, and display them below.
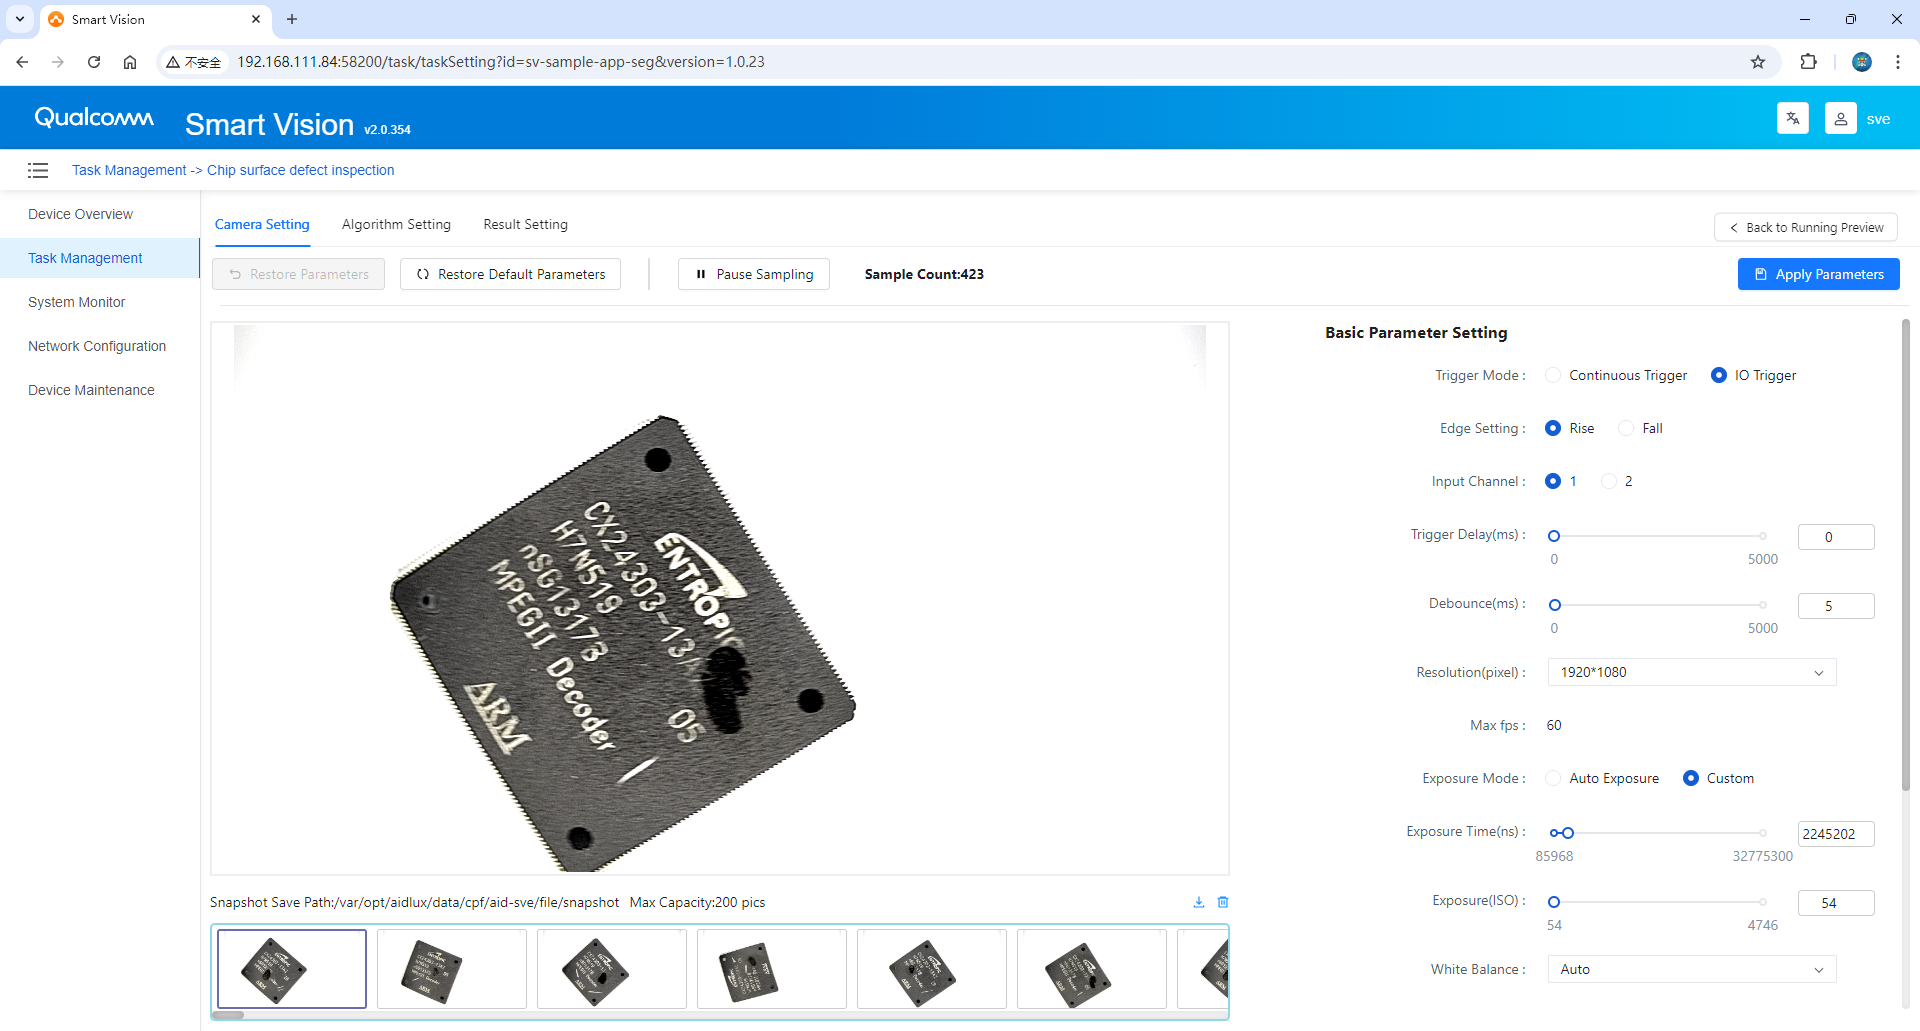
When the trigger method of [ IO trigger ] is selected, the configuration is automatically saved. After the operation is successful, the camera will be automatically turned on. In this mode, an external trigger signal needs to be connected. Once the external signal is received, the camera screen will be photographed, and the corresponding pictures and sampling numbers will be displayed below.
In the image acquisition interface bar, camera parameters can be set, including trigger settings and imaging parameter adjustments.
Basic parameter settings
- Trigger mode:When "IO trigger" is selected, "Edge setting" and "Trigger delay (us)" must be configured. "Edge setting" includes "rising edge" and "falling edge"; "Edge setting" must be configured. "Input Channel" is configured. "Input Channel" is divided into two channels: 1 and 2; the "Trigger Delay" and "Anti-shake" duration must be set. The "Trigger Delay" parameter defaults to 0ms, and the "Anti-Shake" parameter defaults to 5ms.
- Exposure settings:When "Auto Exposure" is enabled, only "Exposure Compensation" can be edited; when "Custom" is enabled, "Exposure Duration" and "Exposure" parameters can be edited.
- White balance settings:Not editable only when "Custom white balance" is enabled. It includes 7 white balance modes: "Incandescent", "Fluorescent", "Warm Fluorescent", "Daylight", "Cloudy", "Dusk" and "Shadow".
Advanced parameter settings
- Saturation: Adjusts the purity or vividness of colors in the image.
- Contrast: Adjusts the difference between the lightest and darkest parts of the image.
- Sharpness: Adjusts the clarity of image edges.
- Custom White Balance: When enabled, you can adjust the Color Settings Mode, which includes Color Temperature and RGB Gain. If RGB Gain is selected, you can edit R Gain, G Gain, and B Gain.
Click Apply Parameters to save the changes. If the image does not look as good as the previous one, you can restore the previous settings by clicking Restore Parameters.
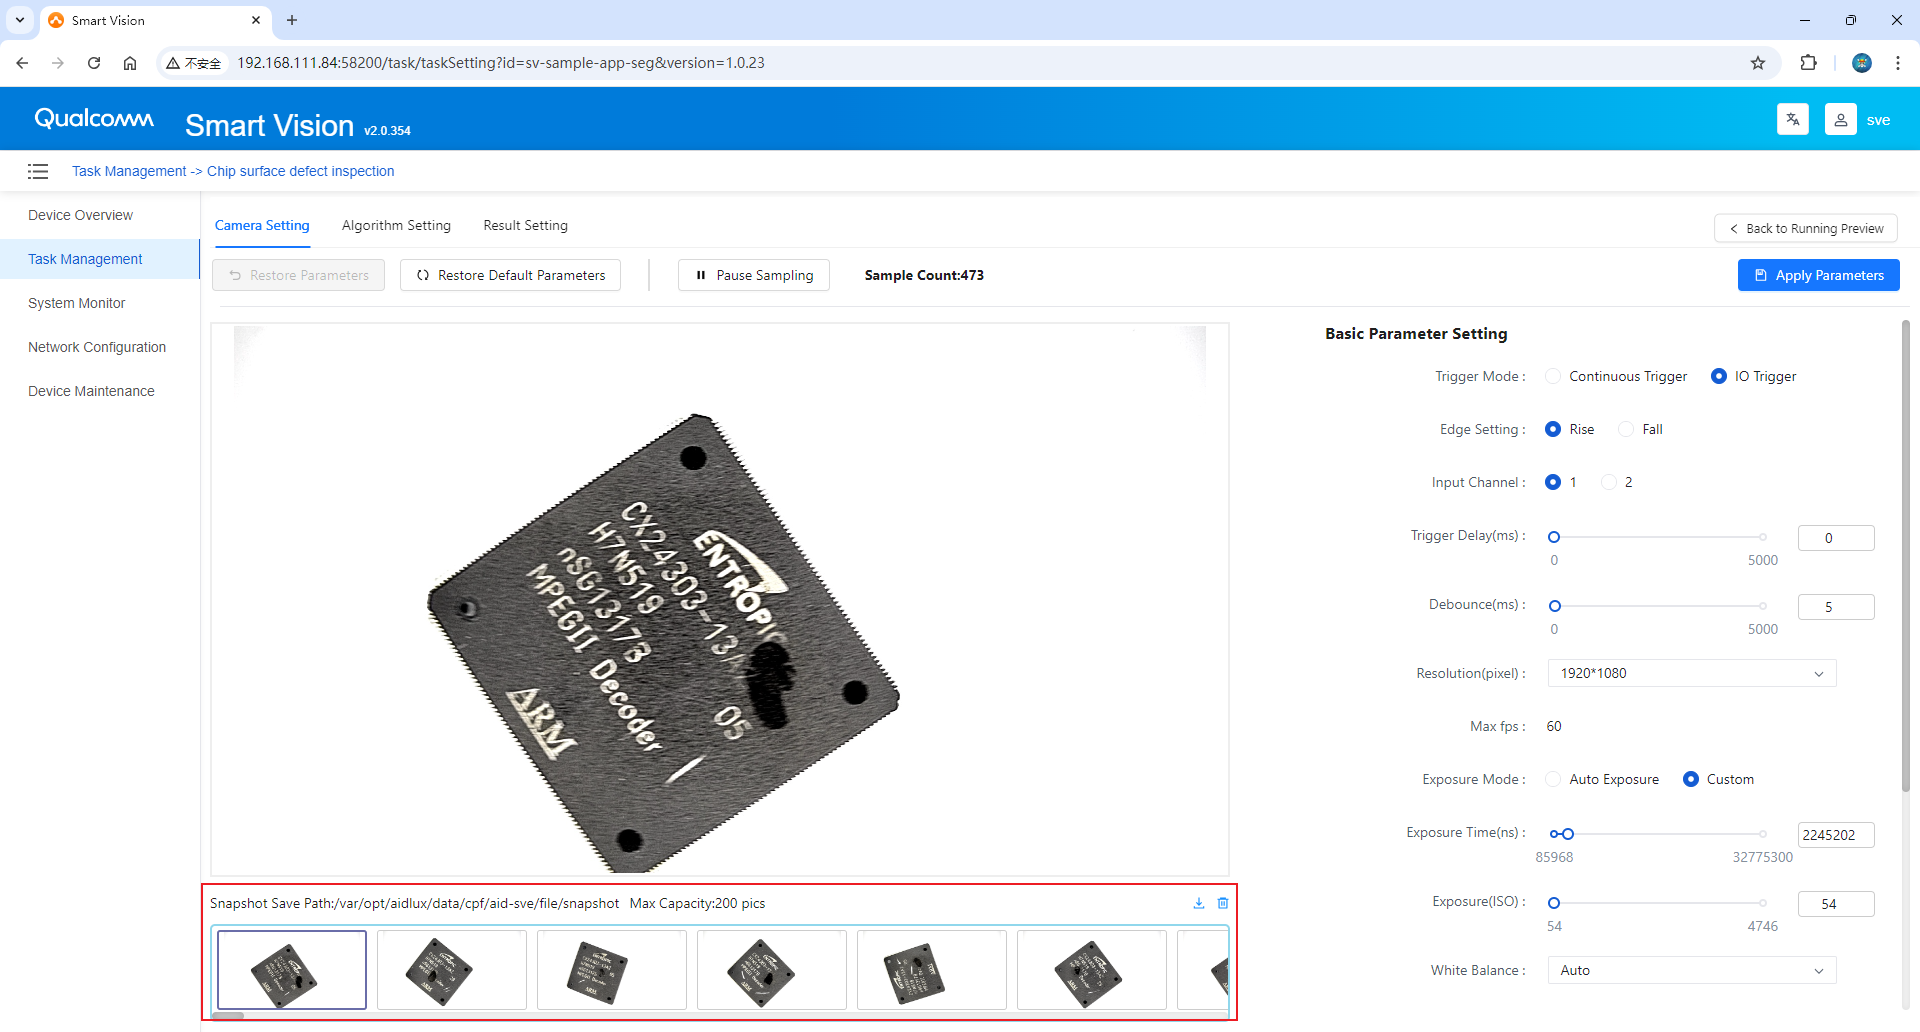
Snapshot images support One-click Export to Zip, One-click Delete, and Single File Delete. The system can store up to 200 snapshots, and when a new snapshot is taken, the oldest one is deleted automatically.
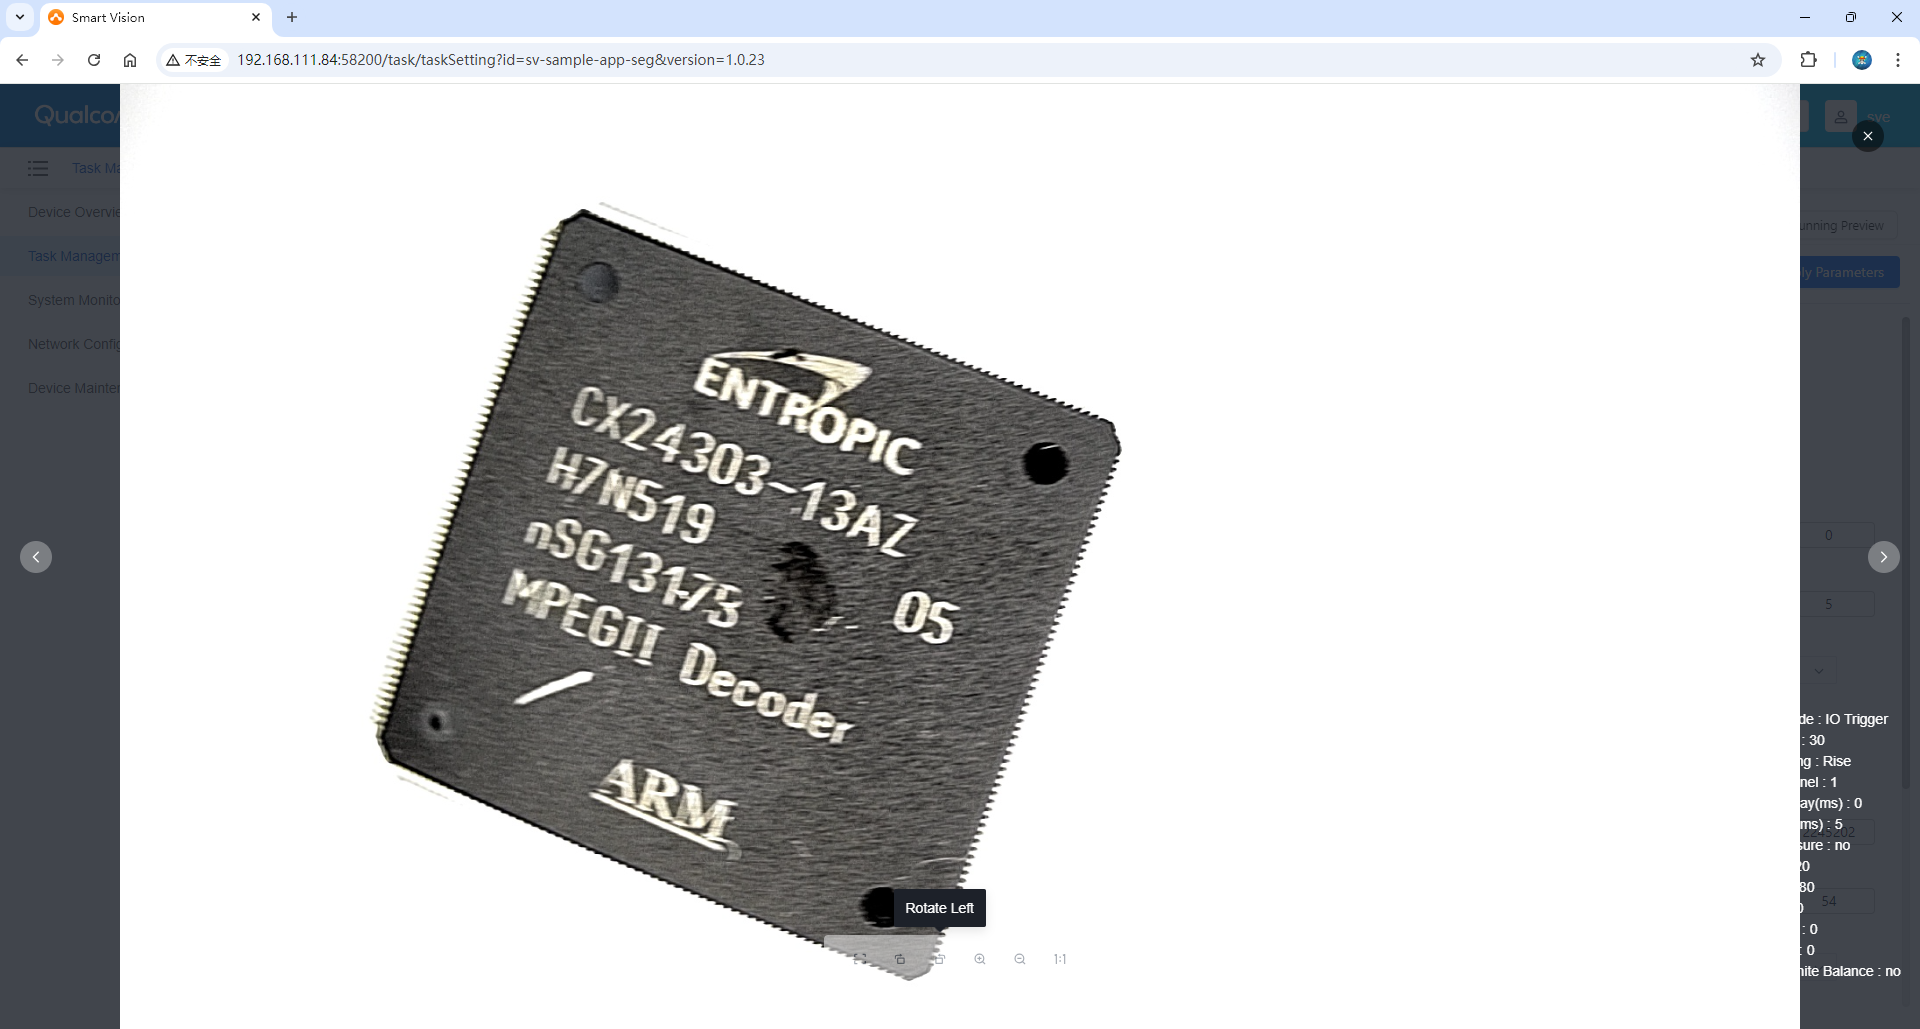
Click any snapshot to view the camera parameters associated with that snapshot independently. You can also use the Fullscreen, Zoom In, Zoom Out, and Rotate features.
Click Back to Runtime Preview to return to the Runtime Preview interface.
Algorithm Settings
- This interface displays threshold parameters related to the corresponding AI application. Different applications will have different threshold parameters, which can be displayed dynamically.
- Click Save Configuration to store the modified parameters.
- Click Reset to revert to the last saved parameters.
- Click Export Configuration to Local to download the current parameter configuration as a JSON file.
- Click Back to Runtime Preview to return to the Runtime Preview interface.
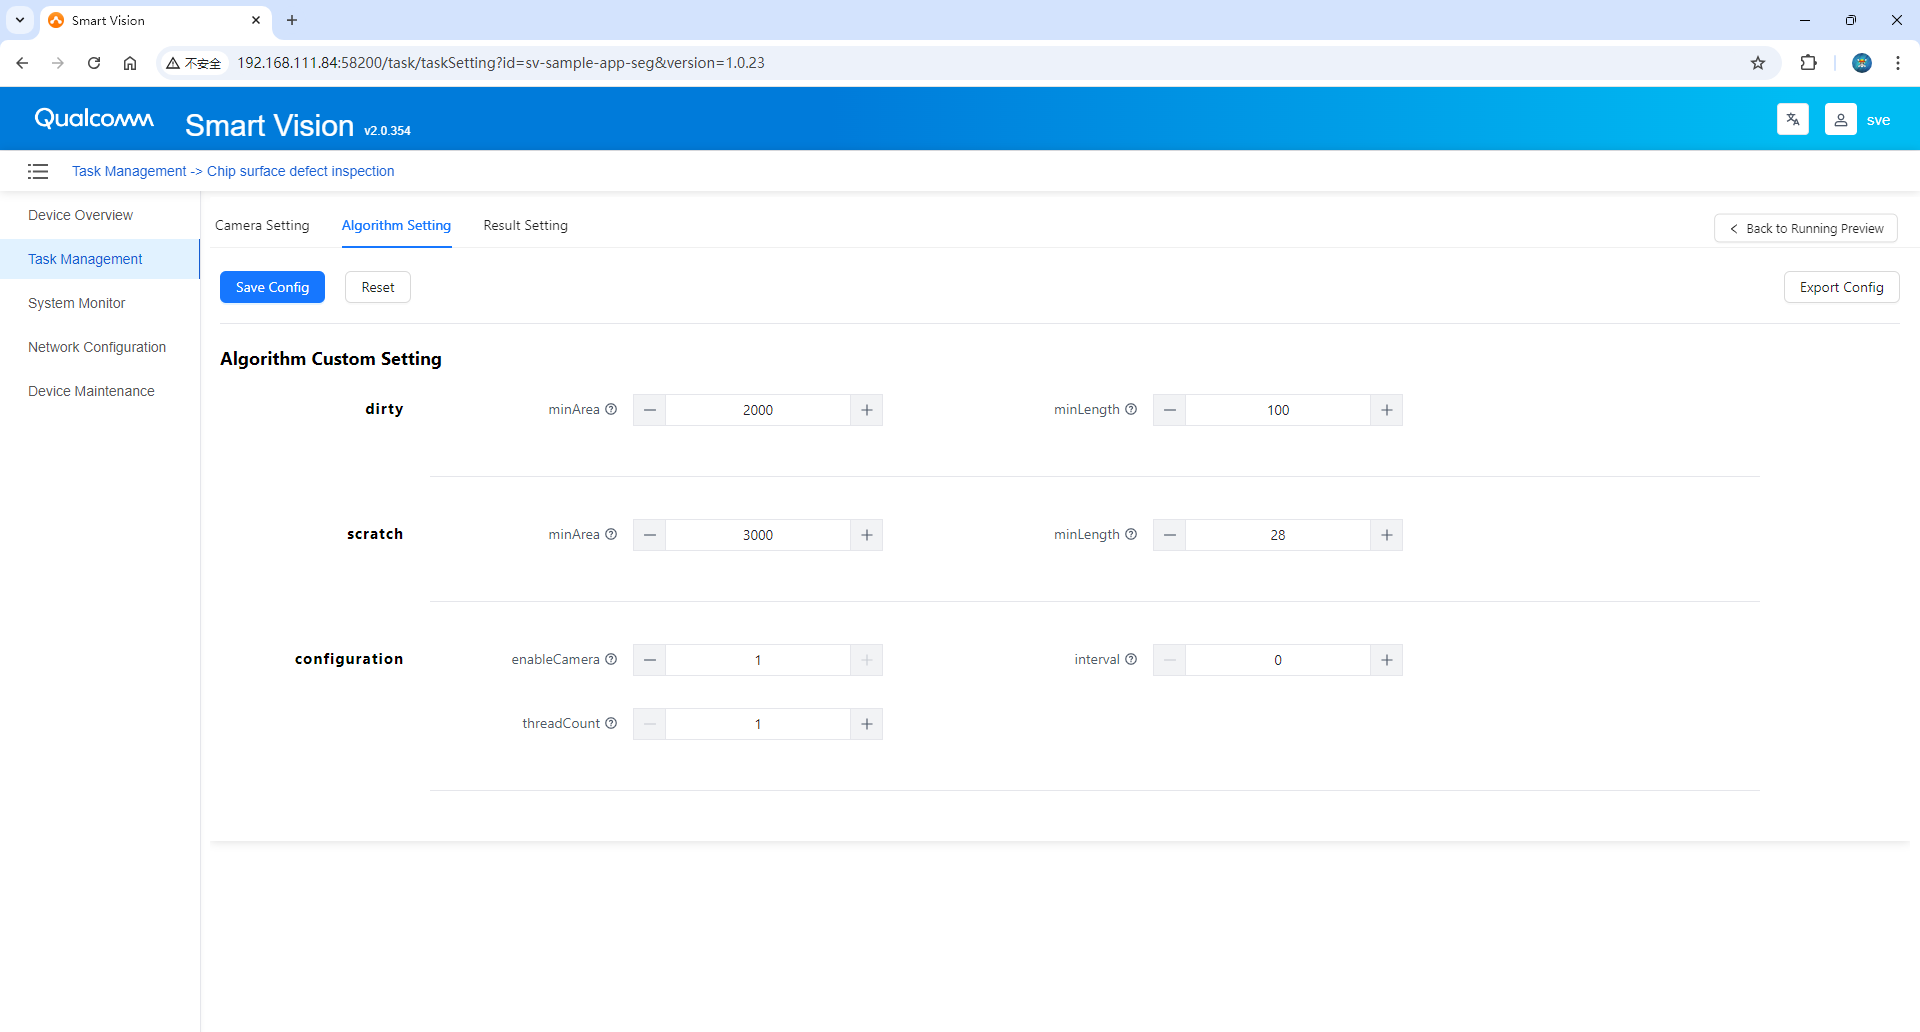
- Dirt: Dirt defects.
- Minimum area: Minimum area for dirt detection
- Minimum length: Minimum length for dirt detection
- Scratch: A scratch defect.
- Minimum area: minimum area for scratch detection
- Minimum length: minimum length for scratch detection
- Configuration:
- Camera/still image: whether to turn on the camera; 0-turn off the camera, 1-turn on the camera
- Image processing interval (seconds): Image processing interval; unit (seconds)
- Number of threads: The number of threads used by the application to actually process images, default 1