Step 5: Build Your First Camera Application
I. Generate a Sample Application (with Source Code)
To help developers get started quickly, the Aidlux system provides the appc command-line tool by default, which can directly generate sample applications based on the SmartVision SDK.
The sample code is available in both C++ and Python versions.
appc Usage Instructions
Enter the Aidlux command line terminal and type "appc -h" to get usage help.

(1) Create a project
You can create different types of projects by using the command: appc init with specified parameters.
For more detailed operational information, you can get additional help using the appc init --help command.

(2) Package a project
Once development is complete, you can package the specific project using the appc package command.
Command format: appc package -p <project path>
Run the following commands on the Camera:
- C++ Example
- Python Example
# Generate C++ sample code in the local directory
aidlux@aidlux:~$ appc init -t "cpp" -n demoApp
aidlux@aidlux:~$ cd demoApp
# Generate Python sample code in the local directory
aidlux@aidlux:~$ appc init -t "py" -n demoApp
aidlux@aidlux:~$ cd demoApp
II. Application Source Code Description
- C++ Example
- Python Example
The file structure is as follows:
├── README.md
├── config                   # Configuration files
│   ├── camera.config        # Camera parameter configuration file (needs an explanation of the camera parameters)
│   ├── algorithm.config     # Algorithm parameter configuration file (needs an explanation of the algorithm parameters)
│   ├── model.config         # Model-related configuration file
├── imgs                     # Static image directory
├── lib                      # Third-party library directory
├── manager.sh               # Application startup script
├── model                    # Model file directory
│   ├── Segment_V41_0
│   │   └── det_bestModelIoU_0.77_v_t_0.81_epoch_019_int8.serialized.bin         # Model bin file
│   ├── det.txt
│   └── modelInfo.json       # Model configuration file
├── release.txt              # Application description file
├── src                      # Main program directory
│   ├── CMakeLists.txt       # CMake build file
│   ├── main.cpp             # Main application code
│   ├── main.hpp             # Header file for the main application code
│   └── model.cpp            # Main code for model loading
├── svapp                    # Executable file
.
├── config                   # Configuration files
│   ├── camera.config        # Camera parameter configuration file (needs an explanation of the camera parameters)
│   ├── algorithm.config     # Algorithm parameter configuration file (needs an explanation of the algorithm parameters)
│   ├── model.config         # Model-related configuration file
├── lib                      # Third-party library directory
├── manager.sh               # Application startup script
├── model                    # Model file directory
│   ├── Segment_V41_0
│   │   └── det_bestModelIoU_0.77_v_t_0.81_epoch_019_int8.serialized.bin         # Model bin file
│   ├── det.txt
│   └── modelInfo.json       # Model configuration file
├── release.txt              # Application description file
├── svapp.py                 # Main application code
.
III. Compile and Package the Source Code for Deployment to the Camera
- C++ Example
- Python Example
1. Confirm the Camera's CMake Build Environment
Run the cmake command to check if CMake is installed.
# CMake is not installed
aidlux@aidlux:~$ cmake
bash: cmake: command not found
If not installed, run the following commands to install CMake.
aidlux@aidlux:~$ sudo apt-get update
aidlux@aidlux:~$ sudo apt-get install cmake
Once installed, running the cmake command and seeing help information indicates a successful installation, as shown in the figure below:

2. Compile the Source Code
Run the following commands on the Camera:
# Enter the sample application directory
aidlux@aidlux:~$ cd ~/demoApp

# Run the build command
aidlux@aidlux:~/demoApp$ cd src/
aidlux@aidlux:~/demoApp/src$ mkdir build
aidlux@aidlux:~/demoApp/src$ cd build/
aidlux@aidlux:~/demoApp/src/build$ cmake ..
aidlux@aidlux:~/demoApp/src/build$ make
After the compilation is complete, an executable file named svapp will be generated in the root directory of the application.
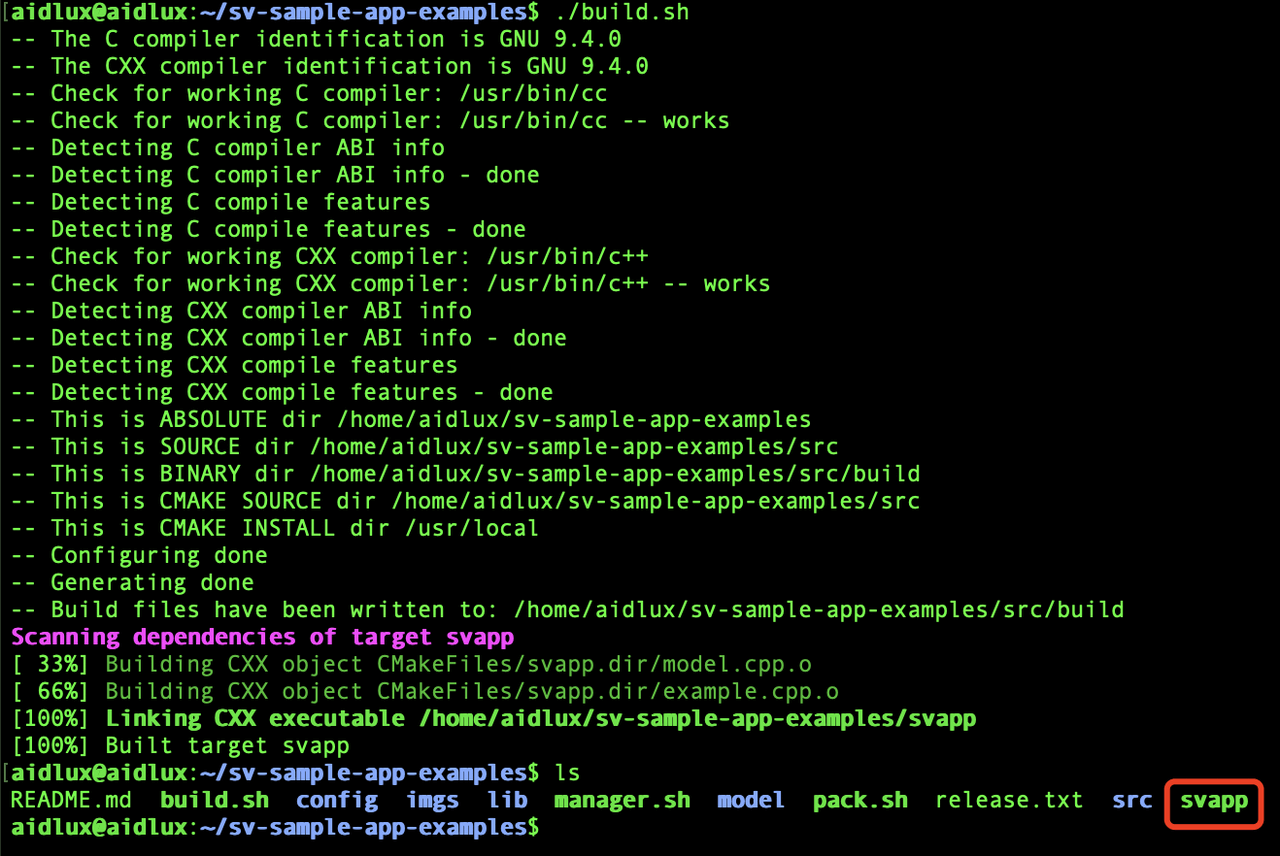
3. Package and Deploy the Application
Run the following commands on the Camera:
# Run the application packaging command
aidlux@aidlux:~$ appc package -p ~/demoApp
After packaging is complete, a deployable application package will be generated in the application directory:

At this point, the entire application has been packaged. Next, proceed to the application deployment process. You can either deploy the application on this camera to preview the effect or deploy it on other camera devices.
Scenario 1: If you need to deploy the application on this camera:
Run the following commands on the Camera:
(1) Run the sve application installation command
# Run the sve application installation command
aidlux@aidlux:~$ appc install ~/demoApp.zip
If the installation process prompts that the application already exists, you can add the "-f" parameter for forced overwrite installation:
appc install -f ~/demoApp.zip
(2) Restart the Smart Camera Application Framework
You need to restart the camera application framework service before the smart camera application list can reload and display the unpacked application.
# Enter the smart camera application framework directory
cd /opt/aidlux/cpf/aid-sve/

# Restart the camera application framework
sudo ./manager.sh restart
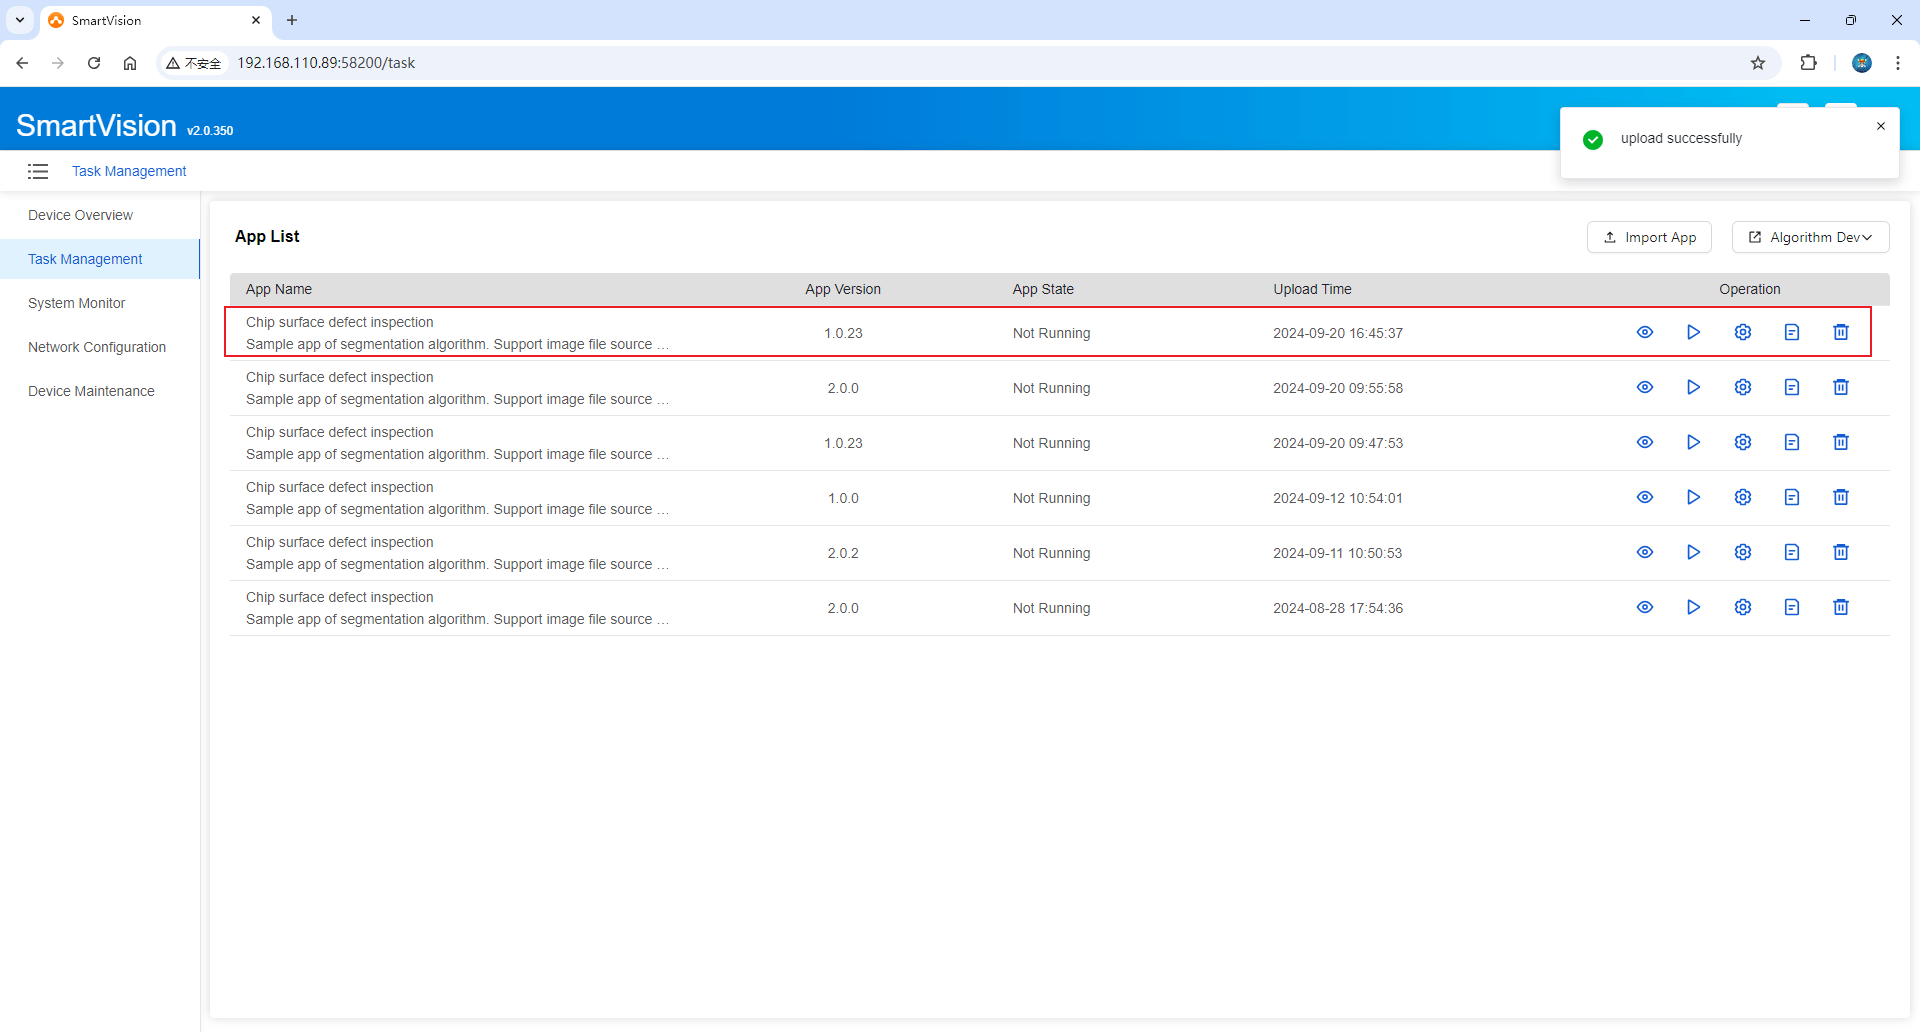
(3) Open the camera management webpage, go to [Task Management], and check the deployed application:
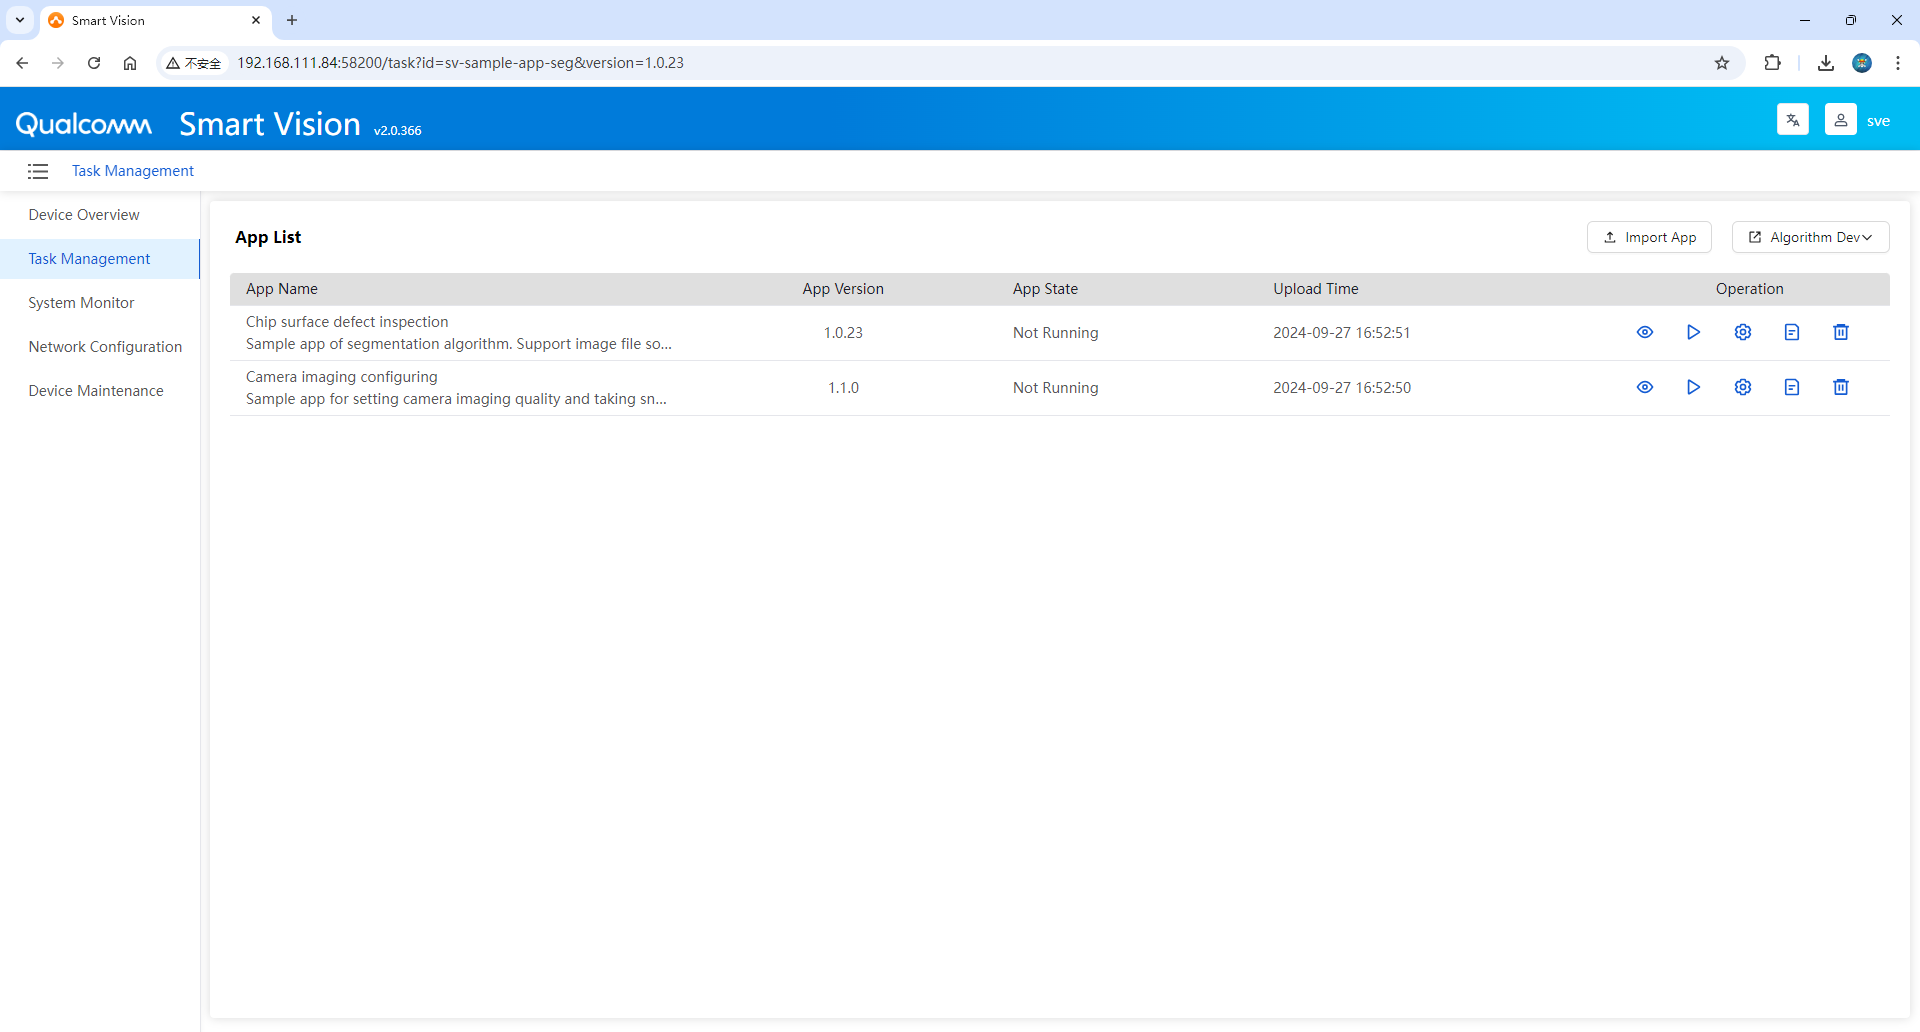
If the sample application appears in the application list, it means the deployment was successful.
Scenario 2: If you need to deploy the application to another camera, first copy the application package to the PC
Run the following commands on the PC: (1) Copy the application package to the PC
# Copy the packaged application from the camera to the local PC
scp aidlux@[camera IP]:/home/aidlux/demoApp.zip ./
(2) Open the management webpage of the other camera, go to [Task Management], click [Import Application Package], and select the application package from the PC.
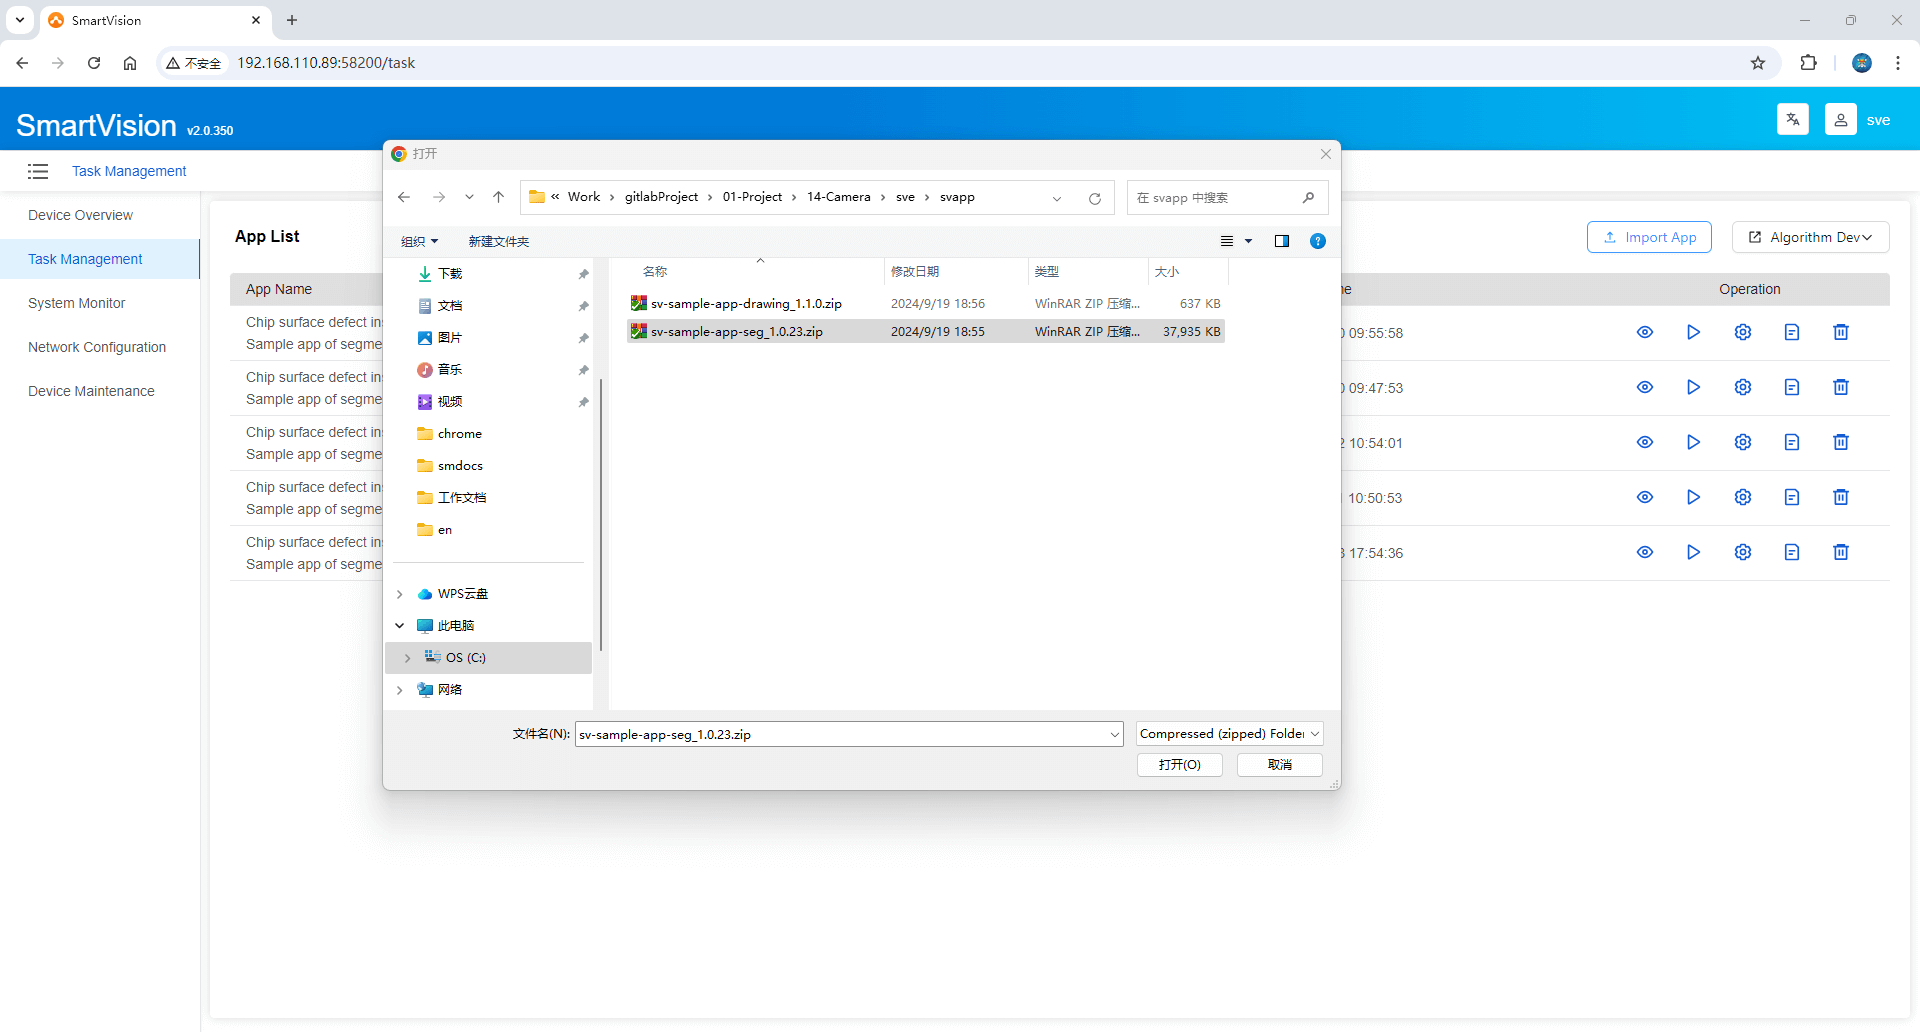
After importing, if the sample application appears in the application list, it means the deployment was successful.
IIII. Preview the running effect
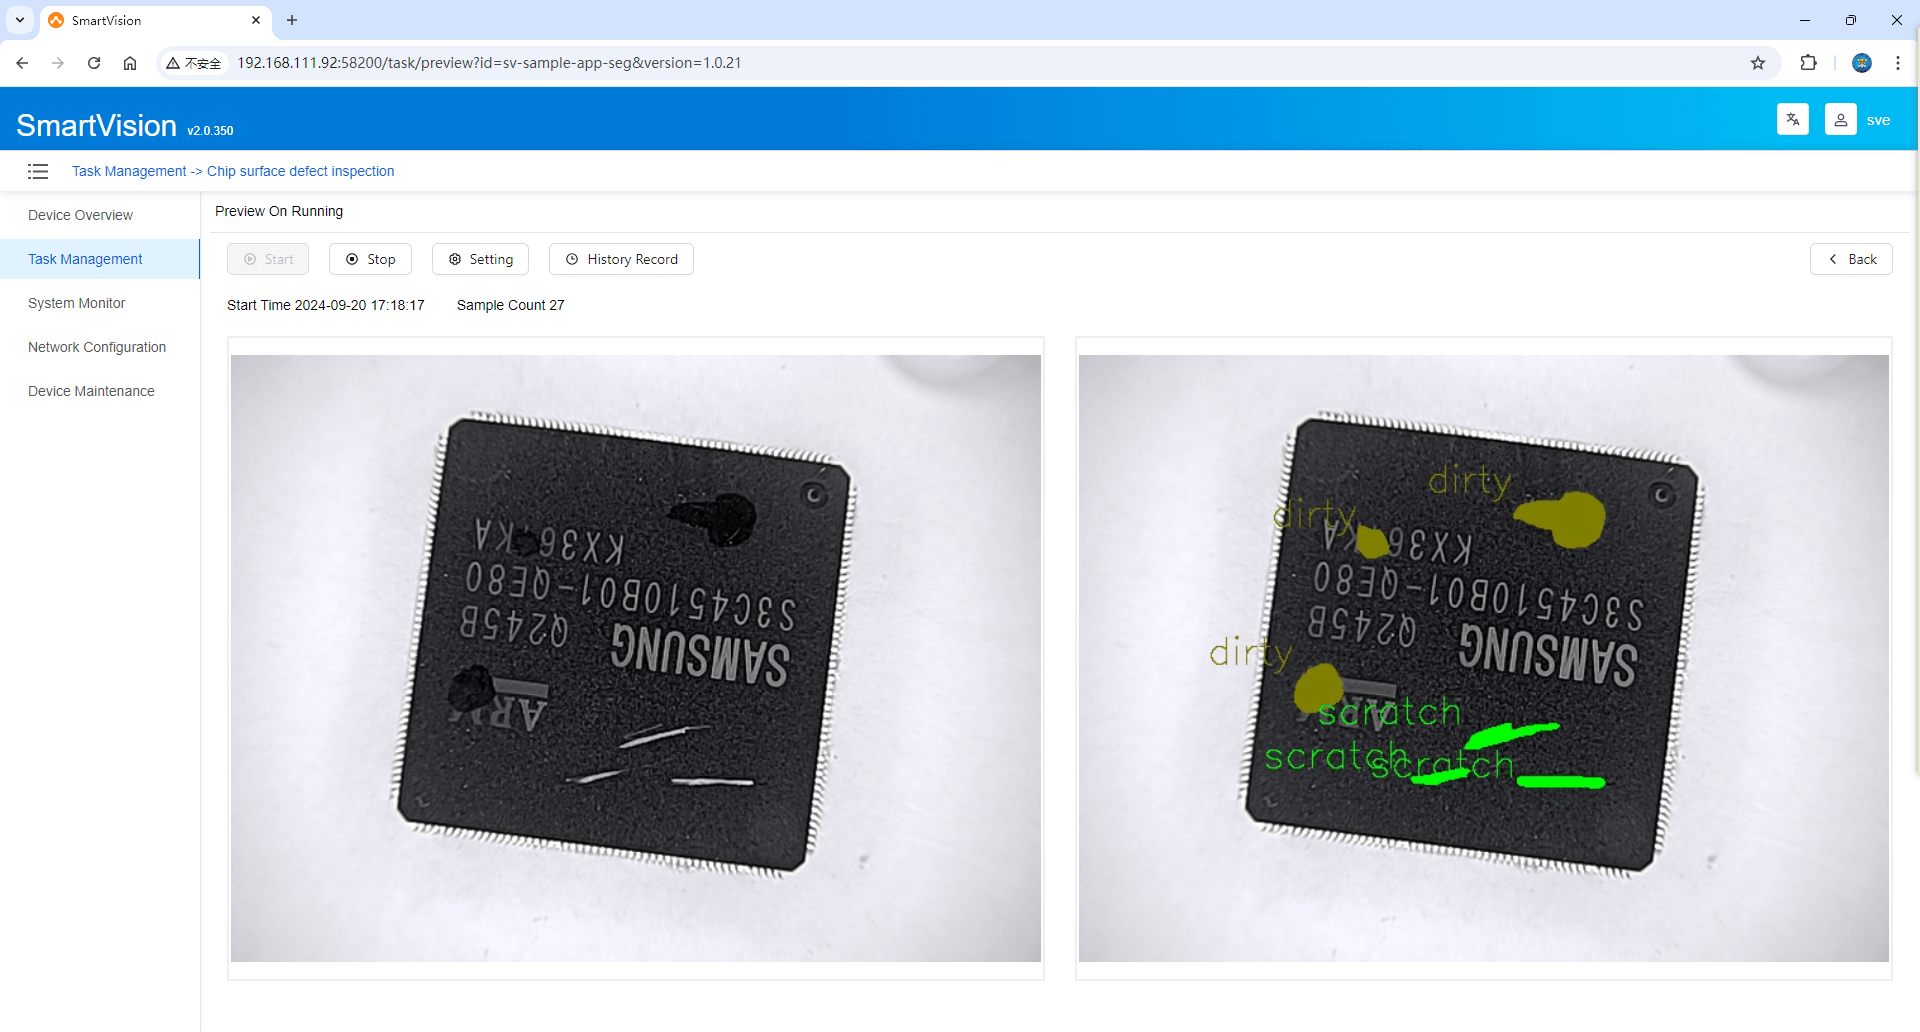
- Click the [ Start/Stop Application ] button in the list to run the application example.
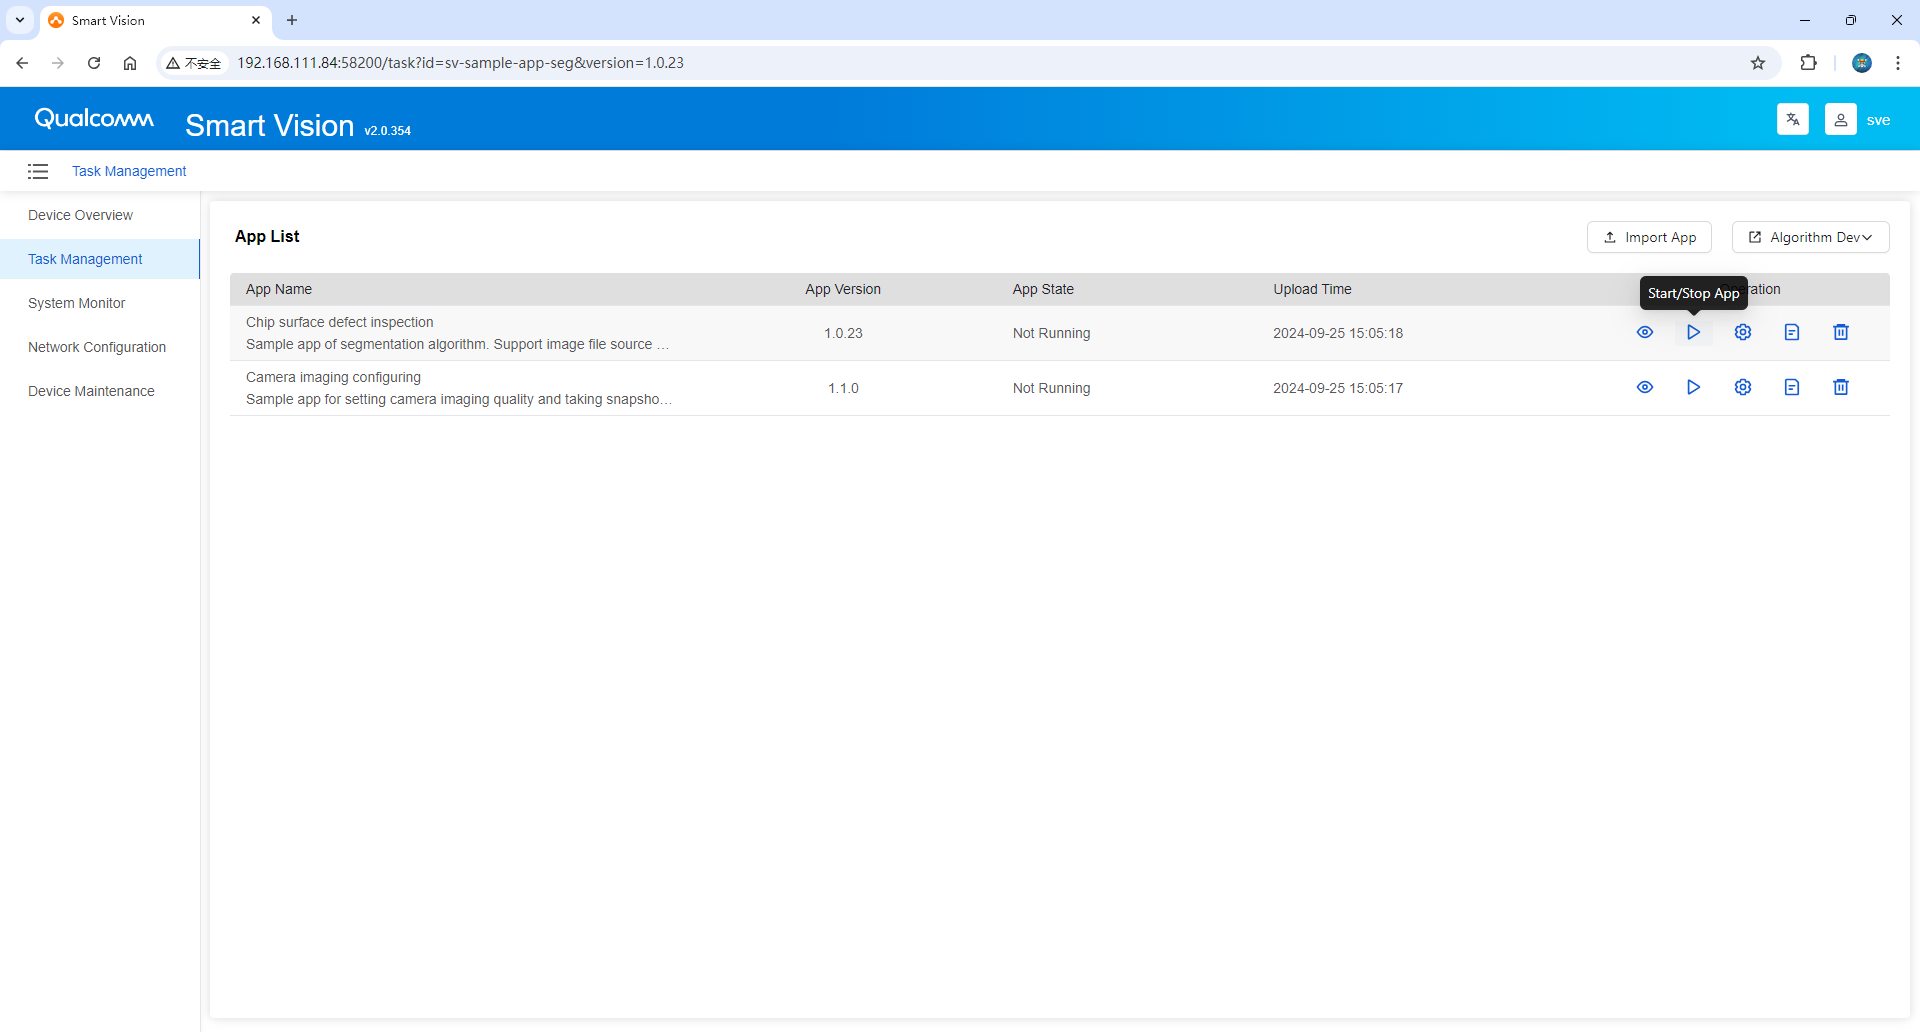
- Click the [Run Preview] button to view the running effect.
