端侧部署 HY-MT1.5-1.8B
介绍
HY-MT1.5-1.8B 是腾讯出品的混元翻译模型 1.5 版本,该模型是 WMT25 冠军模型的升级版,针对解释性翻译和混合语言场景进行了优化,并新增了对术语干预、上下文翻译以及格式化翻译的支持。尽管 HY-MT1.5-1.8B 的参数量不足 HY-MT1.5-7B 的三分之一,但其翻译性能可与较大模型相媲美,兼顾了高速度与高质量。经过量化后,1.8B 模型可部署在边缘设备上并支持实时翻译场景,具有广泛的应用前景。
本章节将演示如何在边缘设备上完成 HY-MT1.5-1.8B 部署、加载与翻译流程。提供以下两种方式部署:
- AidGen C++ API
- AidGenSE OpenAI API
在本案例中,大语言模型推理运行在设备端,通过代码调用相关接口接收用户输入并实时返回对话结果。
- 设备:Rhino Pi-X1
- 系统:Ubuntu 22.04
- 模型:HY-MT1.5-1.8B
支持平台
| 平台 | 运行方式 |
|---|---|
| Rhino Pi-X1 | Ubuntu 22.04, AidLux |
准备工作
Rhino Pi-X1 硬件
Ubuntu 22.04 系统或 AidLux 系统
AidGen 案例部署
步骤一:安装 AidGen SDK
bash
# 安装 AidGen SDK
sudo aid-pkg update
sudo aid-pkg -i aidgen-sdk
sudo aid-pkg -i aidgen-qnn236
sudo aid-pkg -i aidgen-qnn240

# 拷贝测试代码
cd /home/aidlux/aidllm

cp -r /usr/local/share/aidgen/examples/ ./
步骤二:下载模型资源
由于 HY-MT1.5-1.8B 目前位于 Model Farm 预览板块中,需要通过
mms命令获取
bash
# 登录
mms login

# 查找模型
mms list HY

# 下载模型
mms get -m HY-MT1.5-1.8B -p w4a16 -c qcs8550 -b qnn2.36 -d /home/aidlux/aidllm/hy-mt

cd /home/aidlux/aidllm/hy-mt
unzip qnn236_qcs8550_cl2048.zip
mv qnn236_qcs8550_cl2048/* /home/aidlux/aidllm
步骤三:配置文件创建
bash
cd /home/aidlux/aidllm
vim hy-mt-aidgen-config.json
创建如下 json 配置文件
json
{
    "backend_type": "genie",
    "prefix_path": "kv-cache.primary.qnn-htp",
    "model": {
        "path": [
            "hy-mt1.5-1.8b_qnn236_qcs8550_cl2048_1_of_2.serialized.bin.aidem",
            "hy-mt1.5-1.8b_qnn236_qcs8550_cl2048_2_of_2.serialized.bin.aidem"
        ]
    }
}
步骤四:资源文件确认
文件分布如下:
bash
/home/aidlux/aidllm
├── aidgen_chat_template.txt
├── chat.txt
├── htp_backend_ext_config.json
├── hy-mt1.5-1.8b-htp.json
├── hy-mt-aidgen-config.json
├── kv-cache.primary.qnn-htp
├── hy-mt1.5-1.8b-tokenizer.json
├── hy-mt1.5-1.8b_qnn236_qcs8550_cl2048_1_of_2.serialized.bin.aidem
├── hy-mt1.5-1.8b_qnn236_qcs8550_cl2048_2_of_2.serialized.bin.aidem
├── examples
步骤五:对话模板设置
💡注意
对话模板请参考模型资源包中的aidgen_chat_template.txt 文件
根据大模型的模板修改 test_aidgen_text.cpp 文件:
cpp
std::string system_prompt =
    "<|hy_begin▁of▁sentence|><|hy_place▁holder▁no▁3|>\n"
    "<|hy_begin▁of▁sentence|>\n"
    "<|hy_User|>Translate the following segment into Chinese, without additional explanation.\n\n";
// 用户轮:包用户输入 + 触发 assistant 生成
auto make_user_turn = [](const std::string& text) -> std::string {
return text + "\n<|hy_Assistant|>";
};
步骤六:编译运行
bash
# 安装依赖
cd /home/aidlux/aidllm/examples

# 编译
mkdir build && cd build
cmake .. && make

mv test_text_only /home/aidlux/aidllm/

cd /home/aidlux/aidllm/
./test_text_only hy-mt-aidgen-config.json "Success is not final, failure is not fatal: it is the courage to continue that counts. Believe in yourself and all that you are, for greatness lives within your soul."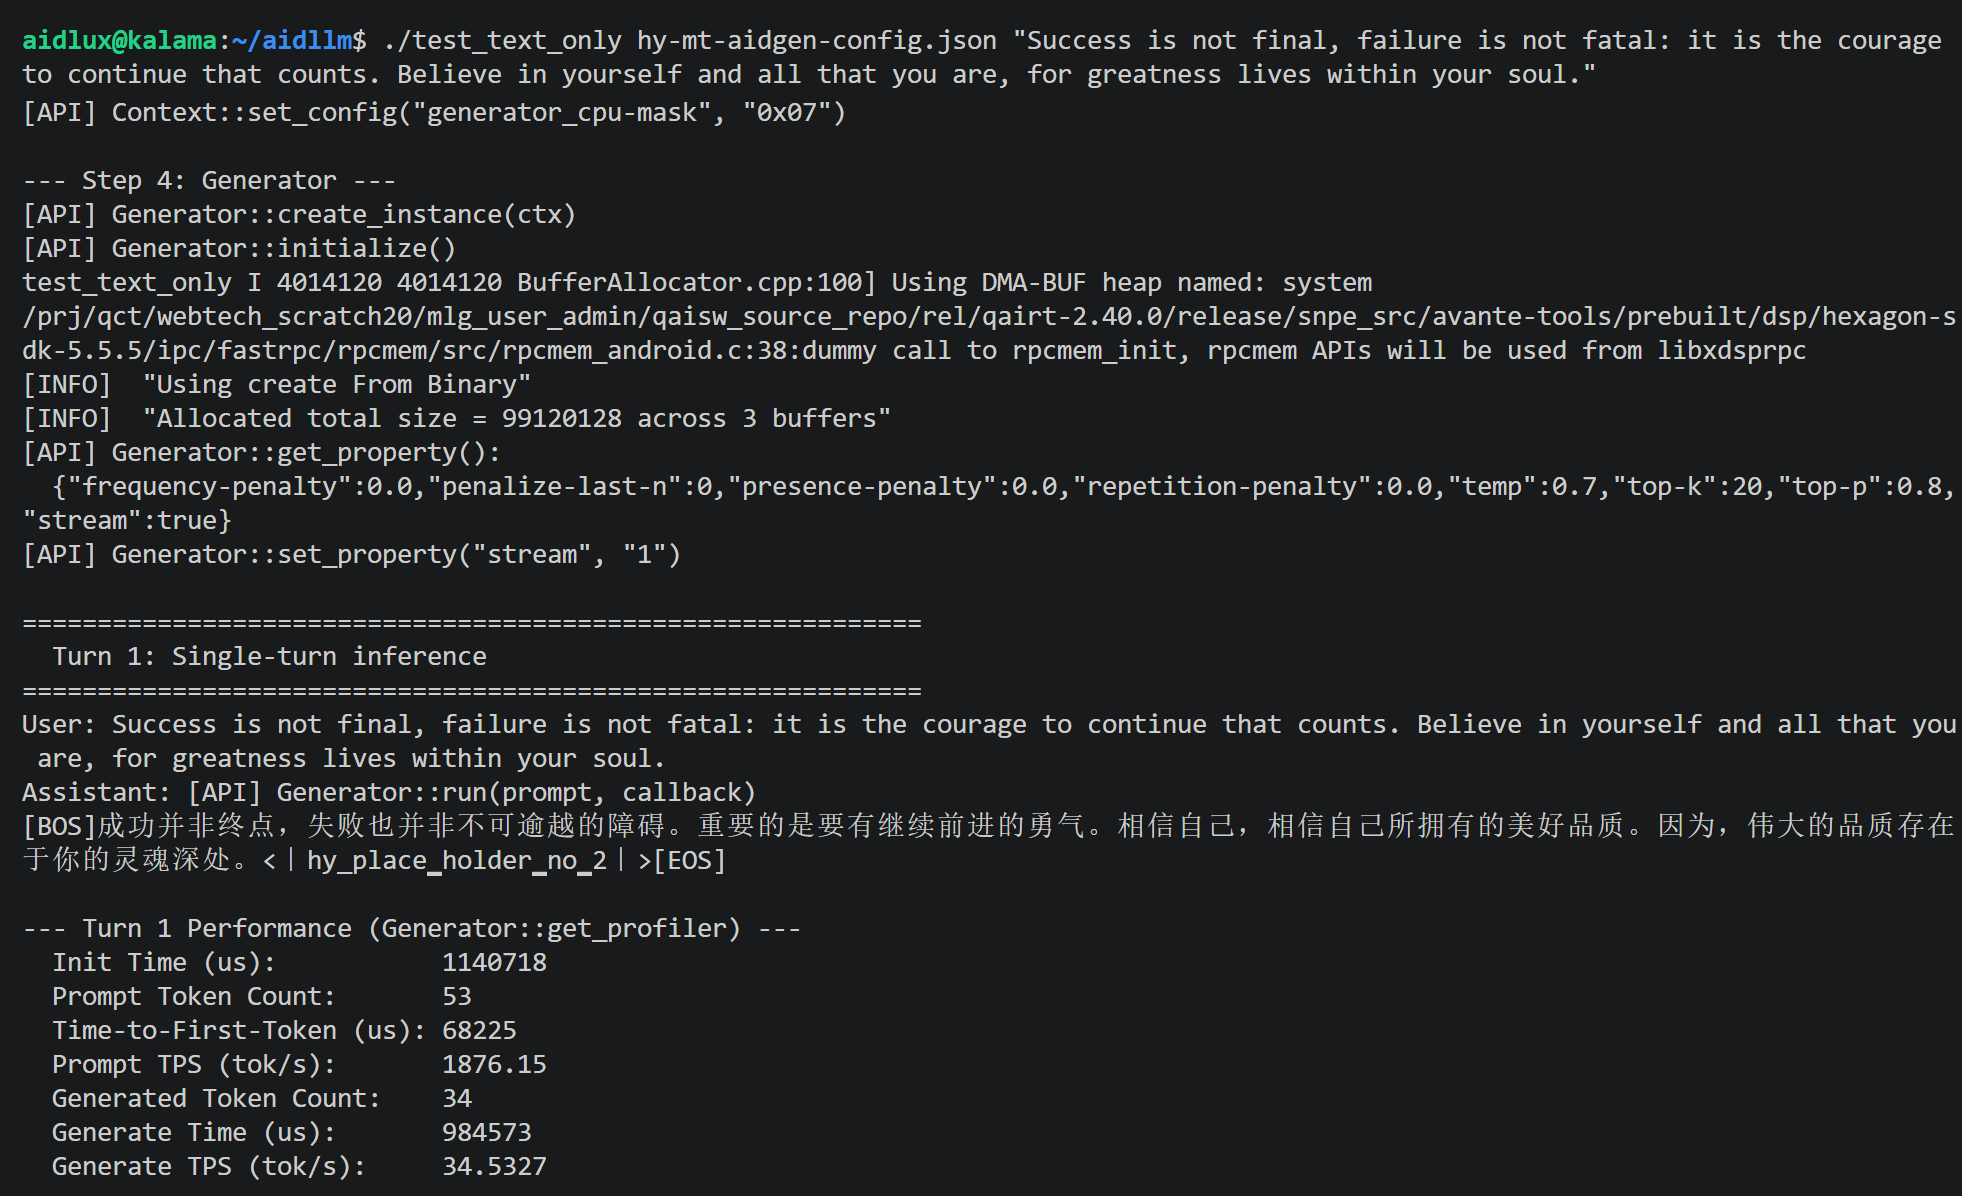
AidGenSE 案例部署
步骤一:安装 AidGenSE
bash
sudo aid-pkg update

# 确保 aidgense 是最新版本
sudo aid-pkg remove aidgense
sudo aid-pkg -i aidgense
sudo aid-pkg -i aidgen-sdk
sudo aid-pkg -i aidgen-qnn236
sudo aid-pkg -i aidgen-qnn240
步骤二:模型查询 & 获取
bash
# 查看模型
aidllm remote-list api | grep hy

#------------------------可以看到 HY-MT1.5-1.8B 模型------------------------

Current Soc : 8550

Name                                                    Url                                                           CreateTime
-----                                                   ---------                                                     ---------
hy-mt1.5-1.8b-qnn2.36-w4a16-qcs8550                     aplux/hy-mt1.5-1.8b-qnn2.36-w4a16-qcs8550                     2026-05-15 10:58:38
...


# 下载 HY-MT1.5-1.8B

aidllm pull api aplux/hy-mt1.5-1.8b-qnn2.36-w4a16-qcs8550
步骤三:启动 HTTP 服务
bash
# 启动对应模型的 openai api 服务
aidllm start api -m hy-mt1.5-1.8b-qnn2.36-w4a16-qcs8550

# 查看状态
aidllm status api

# 停止服务: aidllm stop api

# 重启服务: aidllm restart api
💡注意
默认端口号是 8888
步骤四:对话测试
使用 Web UI 对话测试
bash
# 安装 UI 前端服务
sudo aidllm install ui

# 启动 UI 服务
aidllm start ui

# 查看 UI 服务状态: aidllm status ui

# 停止 UI 服务: aidllm stop ui
UI 服务启动后访问 http://ip:51104
输入如下对话模板即可翻译
plain
Translate the following segment into Chinese, without additional explanation.

Success is not final, failure is not fatal: it is the courage to continue that counts. Believe in yourself and all that you are, for greatness lives within your soul.
使用 Python 对话测试
python
import os
import requests
import json

def stream_chat_completion(messages, model="hy-mt1.5-1.8b-qnn2.36-w4a16-qcs8550"):

    url = "http://127.0.0.1:8888/v1/chat/completions"
    headers = {
        "Content-Type": "application/json"
    }
    payload = {
        "model": model,
        "messages": messages,
        "stream": True    # 打开流式
    }

    # 发起带 stream=True 的请求
    response = requests.post(url, headers=headers, json=payload, stream=True)
    response.raise_for_status()

    # 逐行读取并解析 SSE 格式
    for line in response.iter_lines():
        if not line:
            continue
        # print(line)
        line_data = line.decode('utf-8')
        # SSE 每一行以 "data: " 前缀开头
        if line_data.startswith("data: "):
            data = line_data[len("data: "):]
            # 结束标志
            if data.strip() == "[DONE]":
                break
            try:
                chunk = json.loads(data)
            except json.JSONDecodeError:
                # 解析出错时打印并跳过
                print("无法解析JSON:", data)
                continue

            # 取出模型输出的 token
            content = chunk["choices"][0]["delta"].get("content")
            if content:
                print(content, end="", flush=True)

if __name__ == "__main__":
    # 示例对话
    messages = [
        {"role": "system", "content": ""},
        {"role": "user", "content": "Translate the following segment into Chinese, without additional explanation.\n\nSuccess is not final, failure is not fatal: it is the courage to continue that counts. Believe in yourself and all that you are, for greatness lives within your soul."}
    ]
    print("Assistant:", end=" ")
    stream_chat_completion(messages)
    print()  # 换行